Why Sewing Machine Thread Keeps Breaking: Causes & Fixes
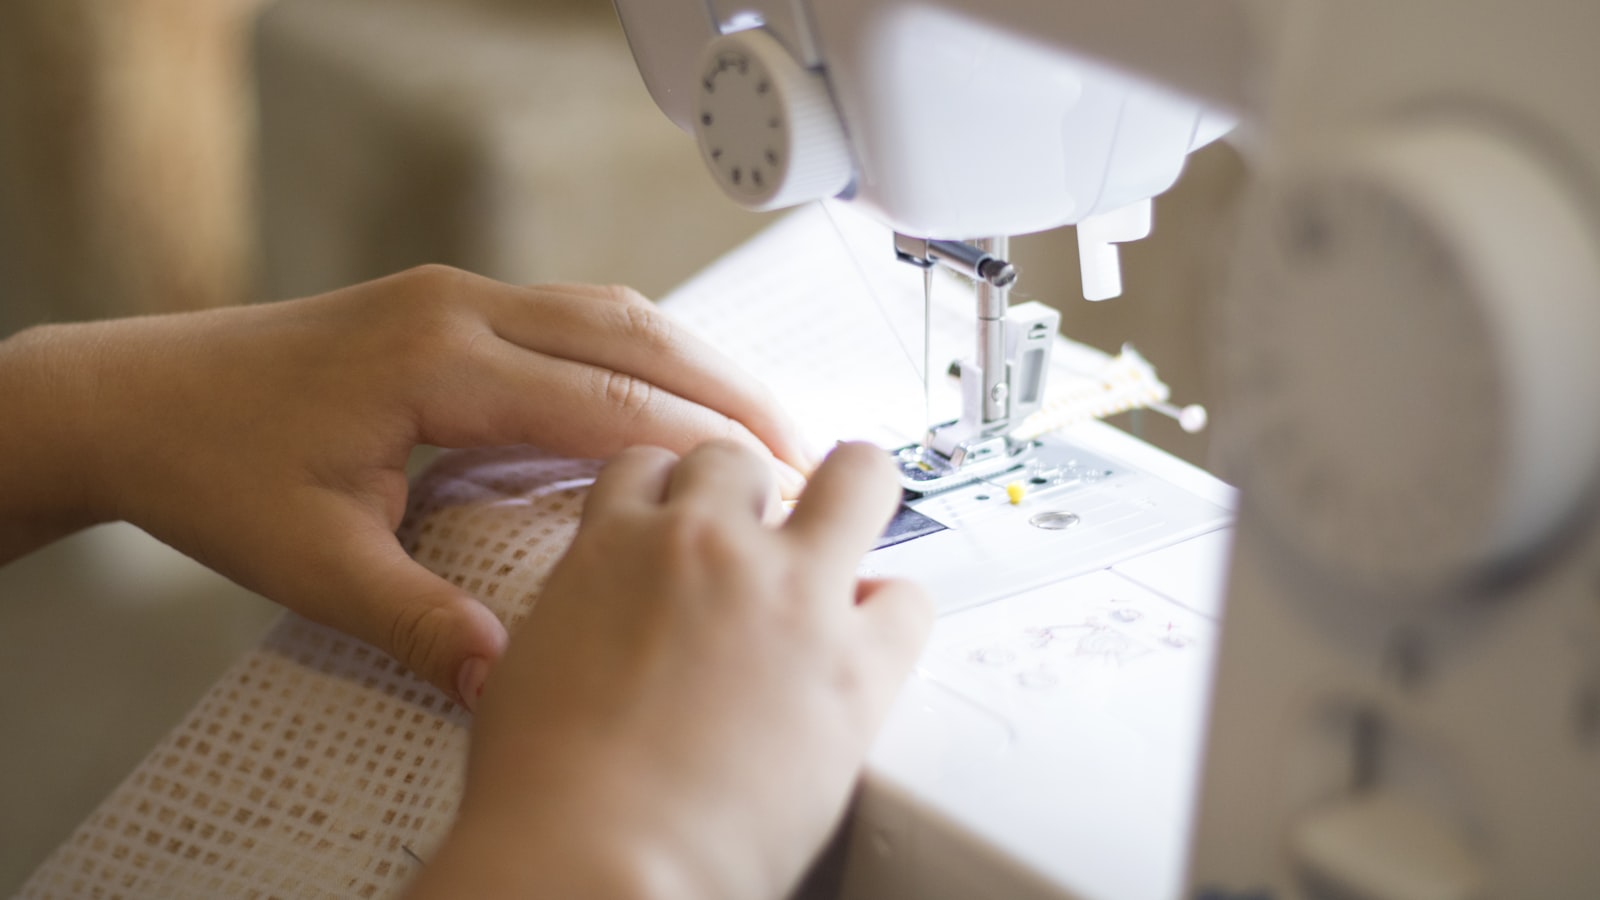
Photo by Ashley Diane Worsham on Unsplash
Disclosure: Some links below are affiliate links. If you buy through them we may earn a small commission at no extra cost to you. This never affects our recommendations.
Key Takeaways
Thread breakage in sewing machines almost always traces back to one of seven mechanical systems: tension, needle, hook, feed dogs, bobbin, thread path, or lubrication. Start with three diagnostic questions to narrow the cause in seconds:
- Where the thread breaks (top or bottom)
- When it breaks (start/stop or mid-stitch)
- What the broken end looks like (frayed, cut, or melted)
Most fixes are tool-free: a systematic check of the thread path, needle condition, and tension settings. Hook timing and feed dog alignment are the exceptions—these require professional adjustment. Thread and needle must match the fabric weight and machine type. A mismatch (like heavy thread in a fine needle) guarantees breakage.
Use the hand-crank test to isolate mechanical issues by sound and feel, and the no-thread test to confirm tension disc function. For quick reference, the Thread Breakage Decision Table maps symptoms directly to fixes, skipping the guesswork.
Part of our complete guide: for the full picture, see What Causes Seam Puckering When Sewing? The Mechanical Breakdown.
How to Diagnose Thread Breakage Like a Technician (Without a Manual)
Thread keeps breaking, but the machine itself gives you the clues—if you know where to look. Technicians start with three questions that narrow the cause in under a minute, no tools required:
- Where does the thread break?
- When does it break?
- What does the broken end look like?
The answers point straight to the system at fault.
The Three Diagnostic Questions
1. Where does the thread break?
- Top thread breaking at the needle: Check the thread path—guides, tension discs, or the needle itself. A snag here frays the thread before it even reaches the fabric.
- Top thread breaking at the fabric: The hook or bobbin case is likely cutting it. The needle may be deflecting, or the hook timing could be off.
- Bobbin thread breaking: The bobbin tension is too tight, or the bobbin case is damaged. A misaligned feed dog can also shred the thread as it pulls.
2. When does it break?
- At the start of a seam: The thread path or tension is misaligned. The first stitch is where the machine “tests” the setup—if it breaks here, the issue is mechanical, not material.
- Mid-seam, consistently: The needle is deflecting (wrong size or type), or the hook is nicking the thread. A dull needle or misaligned hook will cut the thread cleanly, leaving a sharp break.
- When turning or pivoting: The feed dogs are struggling to move the fabric smoothly, causing the thread to snag or stretch. This often happens with thick layers or sticky fabrics.
3. What does the broken end look like?
- Frayed or shredded: Tension is too high, or the thread is catching on a rough spot in the path (like a burr in a thread guide). The damage happens gradually, weakening the thread until it snaps.
- Clean cut: The needle or hook is slicing the thread. A bent needle, a nick in the hook, or incorrect hook timing will sever the thread abruptly.
- Melted or fused: The needle is overheating, usually from sewing too fast or using the wrong needle for synthetic fabrics. The thread melts before it breaks, leaving a stiff, discolored end.
The Hand-Crank Test: Feel for Mechanical Issues
Remove the thread and turn the handwheel slowly by hand. Listen and feel for:
- Snags or drag: A rough spot in the thread path (like a misaligned guide or a burr in the tension discs).
- Grinding or resistance: The hook or feed dogs are misaligned. Grinding often means the hook timing is off; a clicking sound suggests the feed dogs are hitting the needle plate.
- Uneven movement: If the wheel turns harder in one direction, the hook or bobbin case may be binding.
The No-Thread Test: Listen for Hidden Problems
Run the machine without thread at a moderate speed. Unusual noises point to mechanical issues:
- Grinding or scraping: Hook timing is off. The hook and needle should pass without touching—if they collide, the thread will break cleanly.
- Clicking or rattling: The feed dogs are misaligned or loose. They should move smoothly under the needle plate; if they’re hitting it, the thread will snag.
- Whirring or high-pitched noise: The machine may be running too fast for the fabric or needle, causing heat buildup. Slow down and check the needle type.
What the Tests Tell You
- Frayed thread + snag in hand-crank test: Tension or thread path issue. Clean the path and check the tension discs for burrs.
- Clean cut + grinding in no-thread test: Hook timing is off. The hook is misaligned and needs professional adjustment.
The 7 Mechanical Causes of Thread Breakage (And How to Check Each)
Thread keeps breaking because one of seven systems is out of balance—tension, needle, hook, feed dogs, bobbin, thread path, or lubrication. Each leaves its own fingerprint on the thread, and each can be checked by hand in under a minute. Here’s how to spot them, what to look for, and what to do next.
1. Tension Discs: The Hidden Brake
Tension discs are the machine’s brake pads. When they’re dirty, worn, or misaligned, they grip the thread unevenly, creating weak spots that snap under load. The symptom is always the same: thread breaks at the same point in the stitch cycle, usually just after the needle pulls up.
Check for lint first
With the presser foot up, run a scrap of fabric between the discs—if it catches or drags, lint is packed in. A soft brush (the kind that comes with needle sets) will clear most of it. If the discs are pitted or corroded, they’ll need replacing. Corrosion shows as dark streaks or a rough texture; if you see it, the discs are past cleaning.
Check for gaps next
Lower the presser foot and watch the discs close. If you can see daylight between them, the spring is weak or the mechanism is bent. A healthy pair should close completely—no gap, no wobble. If they don’t, the tension assembly needs adjustment or replacement.
Check for misalignment last
Turn the handwheel slowly and watch the thread path. If the thread jumps or skips between the discs, the upper tension is out of sync with the bobbin. This is a timing issue, not a cleaning one, and it’s the only cause that requires a manual to fix.
2. Needle Issues: The Point of Failure
A needle that’s bent, blunt, or the wrong size for the thread will break it every time. The symptom is a sharp ping as the thread snaps, usually on the upward stroke. If the break happens at the eye, the needle is the problem.
Check for burrs first
Run a fingertip along the eye and the point—if it catches, the needle is damaged. A magnifying glass helps, but the fingernail test is faster: if it snags, the needle’s done.
Check insertion next
The flat side of the needle shank must face the back of the machine. If it’s rotated even slightly, the hook will miss the thread loop, causing a break. Most machines have a small mark or arrow on the needle bar to show the correct orientation—if yours doesn’t, the manual will.
Check compatibility last
Thread weight and needle size must match. If the needle is too small for the thread, the eye will fray it; if it’s too large, the fabric will resist. The symptom is always the same: skipped stitches or visible holes in the fabric. The fix is to step up or down one size and test again on a scrap. No chart can tell you which size to use—only the scrap can.
3. Hook Timing: The Silent Cutter
The hook is supposed to catch the thread loop cleanly. If it’s out of time, it slices the thread instead. The symptom is a loud pop as the thread breaks, usually on the first stitch of a seam. If you hear that sound, the hook is the problem.
Test by hand-cranking
Remove the needle and thread, then turn the handwheel slowly. Watch the hook pass the needle position—it should clear the spot where the needle would be by at least the thickness of a business card. If it touches, the timing is off.
Test with the no-thread test next
Thread the machine but leave the bobbin empty. Turn the handwheel—if the hook catches the thread loop smoothly, the timing is correct. If it snags or the thread pops, the hook is misaligned.
Check the hook point last
A burr or nick on the hook will cut the thread every time. Run a fingertip along the point—if it catches, the hook needs replacing. This is the only part of the machine where a single sharp edge can ruin everything.
4. Feed Dogs: The Fabric Movers
Feed dogs pull the fabric through the machine. If they’re worn or misaligned, the fabric moves unevenly, putting extra stress on the thread. The symptom is thread breaks that happen in clusters, usually when sewing over seams or thick layers.
Check for smooth movement first
With the presser foot up, turn the handwheel and watch the feed dogs rise and fall. They should move in a straight line, not wobble or tilt. If they don’t, the mechanism is bent or the screws are loose.
Check for gaps next
Lower the presser foot and look at the throat plate. The feed dogs should sit flush with the plate—no visible gap. If there’s a gap, the fabric will get caught, and the thread will break. This is a height adjustment, not a replacement issue.
Check for wear last
Run a fingertip along the teeth—if they feel smooth or rounded, they’re worn out. Feed dogs should feel like a fine file. If they don’t, they’ll need replacing.
5. Bobbin Case: The Hidden Snag
A damaged or dirty bobbin case will snag the thread every time. The symptom is thread breaks that happen at the same point in the stitch cycle, usually just after the hook catches the loop.
Check for burrs first
Run a fingertip along the inside of the bobbin case—if it catches, the case is damaged. A magnifying glass helps, but the fingernail test is faster: if it snags, the case needs replacing.
Check insertion next
The bobbin must spin clockwise in the case (for most machines—check your manual for exceptions). If it’s inserted backward, the thread will tangle and break. The manual will show the correct orientation.
Check tension last
Hold the bobbin case by the thread and let it drop. It should fall slowly, about an inch per second. If it drops too fast, the tension is too loose; if it doesn’t drop at all, the tension is too tight. This is a symptom, not a setting—adjust the screw until the bobbin drops at the right speed.
6. Thread Path: The Fraying Route
The thread path is full of sharp edges and tight turns. If any of them are rough or misaligned, the thread will fray and break. The symptom is thread breaks that happen at random points in the stitch cycle, usually with visible fraying on the thread.
Follow the thread path first
Thread the machine and run a scrap of fabric through. Watch the thread as it moves—if it catches or hesitates at any point, that’s where the problem is.
Check for rough edges next
Run a fingertip along the thread path—if it catches, the part is damaged. A magnifying glass helps, but the fingernail test is faster: if it snags, the part needs replacing.
Check for misalignment last
The thread should move in a straight line from the spool to the needle. If it’s twisted or angled, the threading is wrong. The manual will show the correct path—follow it exactly.
7. Lubrication: The Friction Factor
Dry or over-oiled mechanisms increase friction, which weakens the thread. The symptom is thread breaks that happen when the machine is cold, or when sewing at high speed.
Check for squeaking first
Turn the handwheel slowly—if it squeaks, the mechanism is dry. A drop of oil on the moving parts will fix it, but don’t overdo it. Too much oil will attract lint and make the problem worse.
Check for resistance next
Turn the handwheel—if it feels stiff or jerky, the mechanism is dry. A drop of oil will fix it, but again, don’t overdo it.
Check for visible dryness last
Look at the moving parts—if they look dry or dusty, they need oil. If they look wet or sticky, they’ve been over-oiled. Wipe off the excess and oil sparingly.
What to Do Next
Each of these checks takes less than a minute. Start with the one that matches the symptom, and work your way through the list. If you find a problem, fix it and test again on a scrap. If the thread still breaks, move to the next check. The machine will tell you what’s wrong—you just have to listen.
How to Match Thread and Needle to Your Fabric (The Compatibility Check)
Photo by Alexander Andrews on Unsplash
Thread keeps breaking because the needle and thread aren’t matched to the fabric’s weight. The rule is simple:
- Heavy fabric needs thicker thread and a larger needle.
- Lightweight fabric needs finer thread and a smaller needle.
The machine can’t compensate for a mismatch—it will either shred the thread or skip stitches.
Where to Find the Match
The numbers you need are printed in three places:
- The needle packet – Look for the size (e.g., 90/14) and the fabric it’s recommended for (e.g., “denim” or “silk”).
- The thread spool – The weight (e.g., 40 wt, 50 wt) is on the end label, often with a suggested use (“quilting,” “all-purpose”).
- The fabric care label – The fiber content (e.g., 100% cotton, polyester blend) and weight (“medium,” “heavyweight”) tell you how dense the weave is.
Hold the needle packet, thread spool, and fabric label together—if the numbers align, the combination will sew cleanly. If they don’t, the machine will fight you.
How to Spot a Mismatch
A mismatch leaves a fingerprint:
- Thread shredding – The needle is too small for the thread or fabric, forcing the fibers through a hole that’s too tight.
- Skipped stitches – The needle is too large, pushing the fabric down instead of piercing it cleanly, so the hook misses the loop.
- Fabric distortion – A needle that’s too heavy for delicate fabric will leave visible holes or pucker the weave.
The Speed Trade-Off
- Synthetic threads (polyester, nylon) handle high speeds without fraying.
- Natural fibers (cotton, silk) weaken under tension.
If you’re sewing lightweight fabric at high speed, switch to a shorter stitch length—it reduces the stress on the thread without slowing you down.
The Adjustment Rule
Start with the needle size printed on the packet for your fabric. If the thread shreds, step up one size (e.g., from 80/12 to 90/14). If the stitches skip, step down. The fabric scrap is your final judge—no chart can override what it tells you.
When to Adjust vs. When to Replace: The Wear Checklist
Thread keeps breaking because a part is either misaligned (adjustable) or worn out (replaceable). The difference shows up in symptoms you can see or feel—no tools required.
Needles: Replace if bent, blunt, or burrs appear
- Hold the needle up to a light and roll it between your fingers.
- A bent needle wobbles.
- A blunt needle reflects light off a flat tip instead of a sharp point.
- Burrs catch fabric and snag thread—run a fingernail along the eye and groove to feel for rough edges.
- If any of these appear, replace the needle.
- If the needle is straight and sharp but inserted incorrectly (backward, not fully seated, or bent during insertion), loosen the clamp screw, realign it, and tighten.
Tension discs: Replace if corroded or visibly worn
- Corrosion shows as rough, discolored patches on the disc faces.
- Wear appears as grooves or polished tracks where the thread rubs.
- Both distort tension and cause breakage.
- If the discs are clean but misaligned or dirty, clean them with a folded scrap of fabric run between them under tension, then rethread and test.
- If the grooves or corrosion remain, the discs need replacing—adjusting won’t restore smooth thread flow.
Hook: Replace if chipped or burrs form
- Turn the handwheel slowly by hand and watch the hook pass the needle.
- A chipped hook leaves jagged edges that shred thread.
- Burrs catch and snap it.
- If the hook is intact but timing is off (the hook arrives too early or too late to catch the loop), adjust the timing following your manual’s alignment marks.
- If the hook is damaged, replacement is the only fix.
Feed dogs: Replace if teeth are worn smooth
- Run your fingertip along the feed dog teeth.
- Worn teeth feel rounded and slick, unable to grip fabric.
- If the teeth are sharp but misaligned or clogged with lint, clean them with a stiff brush and check alignment by lowering the feed dogs and turning the handwheel—teeth should rise and fall evenly.
- If they’re smooth, replacement restores grip.
Bobbin case: Replace if cracked or burrs appear
- Inspect the bobbin case for cracks or rough edges around the thread path.
- Burrs catch thread and cause snags.
- Cracks distort tension.
- If the case is intact but thread loops form on the underside, adjust the bobbin tension by turning the screw in small increments and testing after each change.
- If the case is damaged, replacement is necessary—adjusting won’t fix structural flaws.
The Thread Breakage Decision Table: Symptom → Cause → Fix
Photo by Kemal Berkay Dogan on Unsplash
Thread keeps breaking, but the machine leaves a trail of clues—where it snaps, how it frays, and what fabric triggers it. This table turns those symptoms into a diagnostic path: what each one means mechanically, what to check first, and what rules it out.
| Symptom | What it means mechanically | What to check first | What rules it out |
|---|---|---|---|
| Thread breaks at start of stitch | Hook timing or needle insertion is off. The hook either misses the thread loop or catches it too early, snapping it before the stitch forms. | Turn the handwheel slowly by hand. Watch the hook pass the needle: it should clear without contact, and in the correct order. | If the hook moves smoothly and the needle is straight, timing is ruled out. |
| Thread breaks mid-stitch | Tension or thread path obstruction. The thread is either too tight (creating drag) or caught on a rough edge (fraying it). | Run a scrap of thread through the path without fabric. Feel for snags at guides, tension discs, and the take-up lever. | If the path is smooth and the discs are clean, tension is ruled out. |
| Thread frays before breaking | Needle or thread mismatch. A needle too small for the thread (or vice versa) causes friction, weakening the thread until it snaps. | Hold the needle and thread against the fabric. The needle should pierce without deflecting; the thread should glide through the eye without resistance. | If the needle and thread match the fabric’s weight, mismatch is ruled out. |
| Thread breaks only on thick fabric | Feed dogs or needle are struggling. Feed dogs misaligned or a needle too small for the material can’t push the fabric smoothly, creating uneven tension. | Sew a scrap of the same fabric. Watch the feed dogs: they should move in unison, gripping the fabric without hesitation. | If the feed dogs move smoothly and the needle is sized for the fabric, misalignment is ruled out. |
| Thread breaks with a clean cut | Hook or needle damage. A burr on the hook or a bent needle slices the thread instead of guiding it. | Inspect the hook point under a light. Run a fingernail along it—any snag means a burr. Check the needle for bends or blunted points. | If the hook is smooth and the needle is intact, hook damage is ruled out. |
| Thread loops on the underside | Bobbin tension or hook timing. The bobbin thread isn’t pulling evenly, or the hook isn’t catching the top thread loop correctly. | Remove the bobbin case and check for lint or damage. Rethread the bobbin, ensuring it unwinds in the correct direction. | If the bobbin tension is even and the hook timing is correct, bobbin issues are ruled out. |
| Thread breaks at random intervals | Lubrication or thread quality. Dry hook points or inconsistent thread thickness create sporadic drag. | Run a scrap of thread through the machine without fabric. If it feels gritty or jerky, oil the hook and check the thread for slubs. | If the thread runs smoothly and the hook is lubricated, lubrication is ruled out. |
How to Use This Table
- Start with the symptom that matches your thread breakage.
- Follow the “What to check first” column—each check either confirms the cause or rules it out.
- If the first check doesn’t resolve it, move to the next likely symptom.
The goal isn’t to guess; it’s to isolate the mechanical system at fault by what the machine does, not what it should do.
What the Table Doesn’t Include
- Dimensions or tolerances: These are model-specific and live in the manual. The table focuses on symptoms you can see or feel.
- Brand or model names: Compatibility is determined by the manual and the part’s packaging, not by brand. Match the class (e.g., “low shank”) and the symptom will tell you if it’s wrong.
- Thread or needle sizes: The rule is to match the fabric’s weight, not a chart. If the thread frays, step up the needle size; if the needle leaves holes, step down. The fabric is the gauge.
Frequently Asked Questions
Why does my thread keep breaking only on the top side?
Top-side breaks point to tension or thread-path issues above the needle. The thread is snagging before it reaches the fabric—commonly at a rough spot on the tension discs, a nick in the thread guide, or a misaligned take-up lever.
- Run the no-thread test: hand-crank the machine without thread and feel for drag at each guide.
- If a guide catches your fingernail, it’s sharp enough to cut thread.
- Top-side breaks also happen when the upper tension is too tight for the thread weight; loosen it one click at a time until the thread feeds smoothly under the presser foot.
Can a dull needle cause thread breakage?
Yes, but not the way most people expect. A dull needle doesn’t snap thread—it pushes the fabric instead of piercing it, forcing the thread to bend around the eye. That bend creates friction, which frays the thread until it snaps under tension.
- The symptom isn’t a clean break; it’s shredding on the underside of the fabric, especially on dense weaves.
- Swap the needle and sew the same scrap again. If the shredding stops, the old needle was the problem.
- Needles dull from use, not age, so replace them after:
- Hitting a pin
- Switching to a tougher fabric
- When stitches start skipping on material that sewed fine yesterday
How do I know if my hook timing is off?
Hook timing shows up in two ways: where the thread breaks and what sound the machine makes.
- If the thread snaps at the needle’s eye or frays into a fuzzy ball on the underside, the hook is arriving too early or too late.
- The hand-crank test isolates it: turn the wheel slowly by hand and listen for a metallic tick as the hook passes the needle.
- That tick should happen just after the needle starts its upward stroke.
- If it’s silent or happens too soon, the timing is off.
- Hook timing is a service-manual adjustment, not a DIY fix; the symptom is your signal to stop before you force anything.
What’s the difference between thread breaking and shredding?
- Breaking is a clean snap—usually at a single point in the thread path, like the tension discs or a sharp guide.
- Shredding looks like the thread has been sandpapered into a frayed tail, and it happens when the thread is being abraded repeatedly, often by:
- A dull needle
- A rough hook point
- A bobbin case with a burr
The fix starts with the compatibility check:
- Match the needle size to the thread weight and fabric.
- If the shredding persists, run the no-thread test to feel for rough spots.
- Inspect the hook point with a magnifying glass.
- A hook that looks polished instead of razor-sharp is the culprit.
Should I use the same thread in the bobbin and top?
Not always. The rule is compatibility, not identity: the bobbin thread should be the same weight as the top thread, but it can be a different fiber (e.g., polyester in the top, cotton in the bobbin) if the fabric demands it.
- The symptom of a mismatch is uneven tension—loops on one side, puckering on the other.
- If you’re unsure, wind a bobbin with the same thread you’re using on top and sew a test scrap.
- If the stitches lie flat and the thread doesn’t break, the combination works.
- The exception is heavy fabrics like denim—here, a lighter bobbin thread (e.g., 60 wt) can reduce bulk and prevent breakage.
Final Thoughts: The 30-Second Thread Breakage Checklist
Thread keeps breaking? Run this five-step check before you adjust anything—no tools, no guesswork.
-
Needle first
- Straight, correct size, no burrs.
- Hold it up to the light—if the eye or point is rough, it’s the culprit.
- Swap it out; needles are consumables, not permanent parts.
-
Thread path
- Follow it from spool to needle.
- Every guide, tension disc, and take-up lever must be clean and correctly threaded.
- A single snag here frays thread before it even reaches the fabric.
-
Hand-crank test
- Turn the wheel by hand.
- Feel for drag, listen for unusual noises.
- If it binds or clicks, the issue is mechanical—hook timing, feed dogs, or bobbin case—not tension.
-
Match thread and needle to fabric
- Check the labels.
- Heavy fabric needs a larger needle and thicker thread.
- Lightweight fabric needs finer.
- Mismatches force the thread to fight the material, and it loses.
-
Test on a scrap
- Adjust tension one mark at a time.
- If the thread still breaks, the problem isn’t tension—it’s one of the first four checks.
Bookmark this routine. The next time thread breaks, you’ll know exactly where to look.
20+ Reasons Your Sewing Machine Thread Keeps Breaking (+ Solutions)
1. Your Spool Isn’t Placed Correctly On The Machine or You Are Using a Wrong Spool
- Symptom: Thread tangles or breaks at the spool.
- Fix:
- Ensure the spool spins freely on the pin.
- Use a spool cap if the spool is too small or too large for the pin.
- For cross-wound spools, place them so the thread unwinds counterclockwise.
- For stacked spools, place them so the thread unwinds clockwise.
2. Your Bobbin Isn’t Inserted Correctly
- Symptom: Thread breaks or loops on the underside.
- Fix:
- Check the manual for your machine’s bobbin orientation.
- Most bobbins spin clockwise in the case—insert them accordingly.
- Ensure the bobbin is fully seated in the case.
3. Your Thread Catches On The Spool
- Symptom: Thread frays or breaks at the spool.
- Fix:
- Use a spool net or thread stand to prevent tangling.
- If the spool has a notch or rough edge, sand it lightly with fine-grit sandpaper.
4. Your Thread Wraps Around The Spool Pin
- Symptom: Thread breaks or tangles at the spool pin.
- Fix:
- Place a felt pad between the spool and the pin to reduce friction.
- Ensure the spool is centered on the pin.
5. Your Needle Is Bent or Blunt
- Symptom: Thread breaks with a sharp ping, usually on the upward stroke.
- Fix:
- Replace the needle if it’s bent, blunt, or has burrs.
- Use the fingernail test to check for rough edges.
6. Your Needle Is the Wrong Size for the Thread
- Symptom: Thread frays or shreds at the needle eye.
- Fix:
- Match the needle size to the thread weight.
- For heavy thread, use a larger needle (e.g., 90/14).
- For fine thread, use a smaller needle (e.g., 70/10).
7. Your Needle Is Inserted Backward
- Symptom: Thread breaks or skips stitches.
- Fix:
- Ensure the flat side of the needle shank faces the back of the machine.
- Check the manual for your machine’s needle orientation.
8. Your Tension Discs Are Dirty or Worn
- Symptom: Thread breaks at the same point in the stitch cycle.
- Fix:
- Clean the discs with a soft brush or folded scrap of fabric.
- Replace the discs if they’re corroded or pitted.
9. Your Tension Is Too High
- Symptom: Thread frays or breaks mid-stitch.
- Fix:
- Lower the upper tension one click at a time.
- Test on a scrap after each adjustment.
10. Your Hook Timing Is Off
- Symptom: Thread breaks with a loud pop at the start of a seam.
- Fix:
- Check timing by hand-cranking the machine.
- If the hook touches the needle, take the machine to a professional for adjustment.
11. Your Hook Has a Burr or Nick
- Symptom: Thread breaks with a clean cut.
- Fix:
- Inspect the hook point with a magnifying glass.
- Replace the hook if it’s damaged.
12. Your Feed Dogs Are Worn or Misaligned
- Symptom: Thread breaks when sewing over seams or thick layers.
- Fix:
- Check for smooth movement by turning the handwheel.
- Adjust the feed dog height if they’re not flush with the throat plate.
- Replace the feed dogs if the teeth are worn smooth.
13. Your Bobbin Case Is Damaged
- Symptom: Thread breaks at the same point in the stitch cycle.
- Fix:
- Inspect the bobbin case for cracks or burrs.
- Replace the case if it’s damaged.
14. Your Bobbin Tension Is Too Tight
- Symptom: Bobbin thread breaks or loops on the underside.
- Fix:
- Adjust the bobbin tension screw in small increments.
- Test after each adjustment.
15. Your Thread Path Has a Rough Spot
- Symptom: Thread frays or breaks at random points.
- Fix:
- Run a fingertip along the thread path to feel for rough edges.
- Replace any damaged guides or discs.
16. Your Machine Is Dry or Over-Oiled
- Symptom: Thread breaks when the machine is cold or at high speed.
- Fix:
- Oil the moving parts sparingly.
- Wipe off excess oil to prevent lint buildup.
17. Your Thread Is Low Quality or Old
- Symptom: Thread frays or breaks randomly.
- Fix:
- Use high-quality thread (e.g., Gutermann, Mettler).
- Store thread in a cool, dry place to prevent weakening.
Keep reading
Want to go deeper? Read our guide on Why Bobbin Thread Bunches Underneath: Causes & Fixes.