What Causes Seam Puckering When Sewing? The Mechanical Breakdown
Key Takeaways
Seam puckering isn’t just user error—it’s a mechanical mismatch between thread, needle, feed dogs, and tension. The eight core causes? Tension imbalance (top thread too tight), incorrect needle size (deflecting or tearing fabric), worn feed dogs (fabric shifting instead of advancing), improper thread type (elasticity fighting the stitch), bobbin issues (uneven tension or damage), hook timing (thread loops forming late), fabric stretch (pulling against the feed), and presser foot pressure (compressing unevenly).
Diagnose by isolating symptoms: tight top thread points to tension, fabric shifting signals feed dog wear, and uneven stitches suggest a needle/thread mismatch. Fixes start with verifiable checks—tension dials, feed dog height, needle condition—not guesswork. No manual? The 30-second tests in this guide work on any machine.
Puckering often mimics other problems (skipped stitches, thread breakage). This post’s diagnostic tables map symptoms to causes, so you rule out overlaps before adjusting anything.
How Seam Puckering Actually Happens: The Mechanical Chain
A stitch doesn’t just appear—it’s pulled into existence by a precise sequence of mechanical actions. The needle descends, the hook catches the thread loop, and the feed dogs advance the fabric. Puckering isn’t a single failure; it’s what happens when one of those actions stumbles, leaving the thread unevenly tensioned or the fabric misaligned under the presser foot.
The Three Phases of Stitch Formation
-
Needle penetration The needle carries the top thread through the fabric. A sharp point parts the fibers cleanly; a dull one pushes them aside, distorting the weave before the stitch even forms. That distortion shows up later as puckering around the stitch line.
-
Thread loop formation As the needle rises, the top thread forms a loop behind the eye. The hook (or shuttle) must catch this loop at the exact moment it’s wide enough to encircle the bobbin thread. If the timing is off—too early or too late—the loop is either too small or too large, and the stitch tightens unevenly. That uneven tension gathers the fabric into puckers.
-
Fabric feed The feed dogs grip the fabric and move it forward between stitches. If the feed is inconsistent—worn teeth, incorrect pressure, or misaligned timing—the fabric shifts unpredictably. Each stitch then lands in a slightly different place, pulling the weave out of alignment and creating the characteristic wrinkles of puckering.
Where Puckering Takes Root
The moment the thread loop is pulled taut, the fabric either lies flat or gathers. If the top thread is too tight, it cinches the fabric upward between stitches. If the feed dogs skip or drag, the fabric bunches under the presser foot. And if the needle deflects instead of piercing, the loop forms in the wrong place, tightening against a distorted weave. These are not user errors—they’re mechanical mismatches, each with a distinct signature in the stitch.
The 8 Mechanical Causes of Seam Puckering (And How to Isolate Each)
Seam puckering isn’t a single glitch—it’s the visible symptom of a mechanical mismatch somewhere in the stitch formation chain. Each cause disrupts a different link in that chain, and each leaves a distinct fingerprint on the fabric. Below, the eight core culprits, the exact test that isolates each one, and the mechanism behind why it puckers.
1. Tension Imbalance
The top and bobbin threads must pull against each other with equal force; if one overpowers the other, the fabric buckles where the thread is too tight. The tell is which side puckers: top-side pucker means the bobbin thread is too tight (or the top thread too loose), bottom-side pucker means the top thread is too tight (or the bobbin too loose). Test: sew a straight line on scrap fabric, then tug both threads at the end of the seam—if one side lifts, that’s the thread that needs loosening.
2. Incorrect Needle Size or Type
A needle that’s too thick forces the fabric apart as it pierces, creating distortion; one that’s too thin lets the thread loop instead of locking cleanly. The symptom is consistent pucker along the entire seam, not just at the start or end. Test: swap to a universal needle one size smaller or larger and sew the same scrap again. If the pucker changes or disappears, the needle was the mismatch. Needle packets print the size on the front; step up if the fabric drags, step down if the stitches look loose.
3. Worn Feed Dogs
Feed dogs that are rounded or clogged with lint grip the fabric unevenly, letting it slip instead of advancing in precise increments. The result is a seam that puckers in waves, not in a straight line. Test: turn the handwheel slowly by hand and watch the feed dogs from the throat plate—if they hesitate or skip a tooth, they’re worn. Clean them with a stiff brush first; if the hesitation remains, the teeth need replacing.
4. Thread Type Mismatch
Polyester, cotton, and specialty threads stretch and recover differently under tension. When the top and bobbin threads behave differently, one side of the stitch pulls harder than the other, creating pucker. Test: use the same thread in both top and bobbin. If the pucker stops, the mismatch was the cause. Thread spools print the fiber content and weight on the end; match those two words, not the color.
5. Bobbin Case Issues
A bobbin case clogged with lint or oil behaves like a brake, applying inconsistent tension to the bobbin thread. The pucker appears as random tight spots along the seam. Test: remove the bobbin case, brush out lint with a small stiff brush, and reinsert. If the pucker smooths out, the case was the culprit. Bobbin cases are classed by the shape of their tension spring; the class is stamped on the case and on the bobbin packet—match the two words.
6. Hook Timing
If the hook catches the needle thread loop too early or too late, the loop doesn’t form symmetrically around the bobbin thread. The pucker shows as a slight zigzag or drag on one side of the stitch. Test: turn the handwheel slowly by hand and watch the needle thread loop form around the bobbin. If the loop is lopsided or the hook misses it entirely, the timing is off. Hook timing is set by the service manual for your model; the symptom is the only thing you can judge without it.
7. Fabric Stretch
Knits and bias-cut fabrics stretch while sewing, then recover afterward, pulling the seam into pucker. The symptom is pucker that appears only after the seam is released from the presser foot. Test: sew with a walking foot or a stabilizer. If the pucker disappears, the fabric was stretching during sewing. Walking feet are classed by shank height; the class is printed on the foot’s packaging and in your manual—match the two words.
8. Presser Foot Pressure
Too much pressure drags the fabric; too little lets it shift. The pucker is uniform along the seam, not localized. Test: adjust the pressure dial (if your machine has one) one click at a time and sew the same scrap again. Stop at the first setting where the pucker stops. The dial’s own marks are the only units that matter—no chart knows your fabric’s weight.
How to Test for Puckering Causes Without a Manual (The 30-Second Checks)
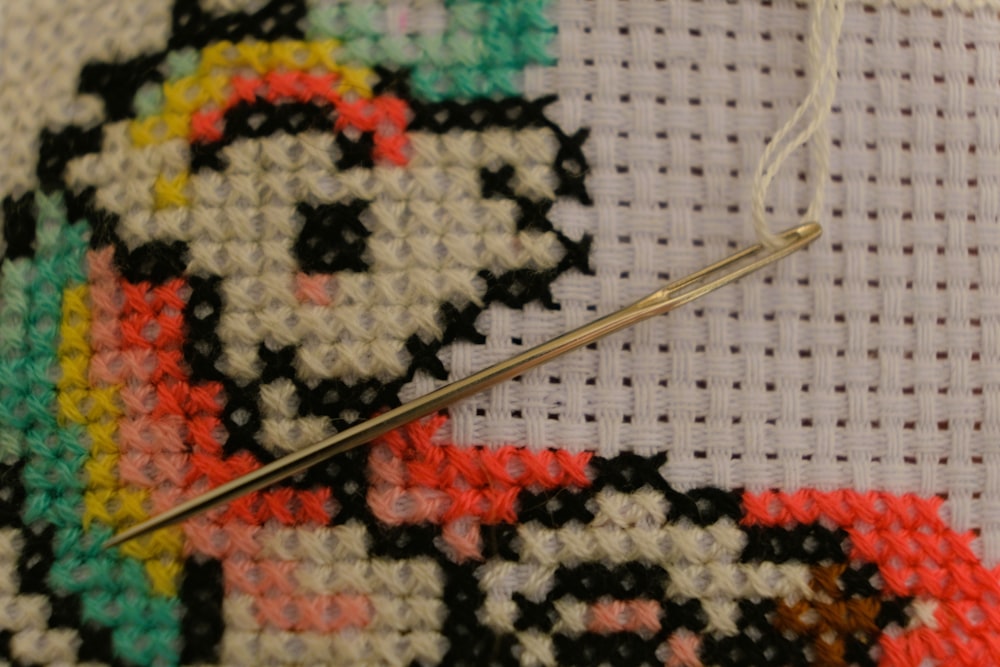
Photo by Lisette Harzing on Unsplash
The Stitch Chain: Presser Feet, Bobbins and Needles Explained — Puckering often stems from using the wrong presser foot, bobbin, or needle for the fabric and stitch type—yet most sewists rely on trial and error to match them. learn how each presser foot and needle affects stitch quality
Puckering isn’t a mystery—it’s a mechanical signal. These five checks isolate the cause in under a minute, no manual required. Run them in order; each rules out one link in the stitch chain.
1. Tension Test
Sew a straight line on scrap fabric. If puckering pulls upward, loosen the top tension in 0.5 increments. If it pulls downward, tighten it. The fabric tells you which way to turn—no numbers needed. Stop when the stitches lie flat on both sides.
2. Feed Dog Test
Place fabric under the presser foot and turn the handwheel by hand. If the fabric slips or stutters, the feed dogs are either worn or clogged. Look for rounded teeth or packed lint—visible wear means they’re no longer gripping the material evenly.
3. Needle Test
Swap to a new universal needle (the packet will label it). If the puckering stops, the old needle was dull or bent. Needles fail silently: a blunt point pushes fabric instead of piercing it, distorting the stitch before it even forms.
4. Thread Test
Use the same thread in top and bobbin. If the puckering disappears, the original threads were mismatched—polyester top with cotton bobbin, for example. Different fibers stretch differently under tension, pulling the seam out of alignment.
5. Presser Foot Test
If your machine has a pressure dial, adjust it. Too much pressure drags the fabric; too little lets it shift. Test on scrap first. The right setting holds the material steady without compressing it—listen for a smooth, consistent feed sound.
Each test targets one mechanical link. The fix is the one that makes the symptom stop.
The Puckering Decision Table: Symptom → Cause → Fix
Puckering isn’t random—it’s a mechanical signal. The table below maps the visible symptom to the broken link in the stitch chain, tells you what to check first, and what rules that cause out if the fix doesn’t work.
| Symptom | What It Means Mechanically | What to Check First | What Rules It Out |
|---|---|---|---|
| Puckering only on top of fabric | Bobbin thread is pulling too hard, lifting the top layer into ridges. | Open the bobbin case and clear lint from the tension spring. | If cleaning doesn’t flatten the pucker, adjust bobbin tension one quarter-turn counter-clockwise. |
| Puckering only on bottom | Top thread is over-tightened, dragging the underside into gathers. | Turn the top tension dial down one full number and sew a test scrap. | If the pucker persists, swap to a new needle—burrs on the old one can mimic tension issues. |
| Fabric shifts while sewing | Feed dogs can’t grip the material, so the stitches bunch instead of laying flat. | Inspect feed dog teeth for rounded edges or polished flats. | If the teeth look sharp, reduce presser foot pressure by one mark on the dial. |
| Uneven stitches + puckering | Needle and thread are mismatched, so the loop isn’t formed cleanly. | Swap to a universal needle and sew the same scrap. | If the pucker stops, the original needle was wrong for the thread weight. |
| Puckering on knit fabrics | The fabric stretches under the foot, then snaps back between stitches. | Attach a walking foot or place a tear-away stabilizer under the fabric. | If the pucker disappears, the fabric was the issue, not the machine. |
| Puckering at seam starts | The take-up lever isn’t lifting the thread fast enough at the beginning of the seam. | Hold both thread tails for the first three stitches to prevent the first loop from pulling tight. | If the pucker still appears, check hook timing—late timing mimics tension problems. |
| Puckering on thick layers | The presser foot can’t press evenly, so the top layer rides up. | Raise the presser foot pressure by one mark and slow the stitch speed. | If the pucker remains, switch to a straight-stitch foot—some zig-zag feet tilt on bulk. |
| Puckering after washing | The thread shrinks more than the fabric, tightening the stitches into gathers. | Pre-wash the thread and fabric together before sewing. | If the pucker still shows, switch to a polyester thread—cotton shrinks more. |
Each row is a verifiable test: run the check, watch the symptom, and move to the next row only if the first fix fails. The table replaces guesswork with a repeatable sequence—no manuals, no specs, just the machine’s own behavior.
How to Tell If Your Machine’s Hook Timing Is Causing Puckering
Hook timing isn’t just a setting—it’s the moment the bobbin hook catches the needle thread loop. If that catch happens too early or too late, the loop forms unevenly, pulling fabric into puckers before the stitch even locks. The test is simple: turn the handwheel slowly by hand and watch the needle thread as it loops around the bobbin thread. It should wrap symmetrically. If the loop is lopsided, or if the hook misses the thread entirely, timing is off.
Puckering from bad timing almost always comes with skipped stitches—if your seam puckers without skips, the problem is elsewhere in the stitch chain. The two symptoms together are the giveaway: the hook isn’t catching cleanly, so the thread tugs the fabric unevenly as it tightens.
To confirm, sew a test line on scrap fabric. If the puckering worsens when you speed up, timing is the likely culprit—faster stitching magnifies the mismatch. If the puckering stays the same or improves with speed, check tension or feed dogs instead.
When timing is off, the fix isn’t a DIY value. The adjustment is model-specific and lives in the service manual. If you’re not comfortable with the handwheel and screwdriver steps, take it to a technician—the symptom is clear, but the cure isn’t a one-size number.
When to Adjust vs. When to Replace: The Wear Checklist
Puckering isn’t just a setting—it’s a signal that a part has either drifted out of adjustment or worn past its mechanical limit. The difference decides whether you reach for a screwdriver or a parts catalog. Below is the decision rule for each link in the stitch chain: what to look for, how to test it, and the symptom that says the part is done.
Feed Dogs
If the teeth are visibly rounded or polished smooth, they no longer grip fabric—replace them. If they’re just packed with lint, a stiff brush and a drop of oil will restore the bite. The test: sew a scrap of mid-weight cotton and watch the feed dogs advance. If the fabric stutters instead of gliding, the teeth are either dirty or worn; clean first, then re-test. Once the teeth are visibly blunted, no amount of cleaning will bring back the original profile.
Needles
A bent needle deflects on descent, pulling the thread loop off-center before the hook can catch it. A dull point pushes fabric down instead of piercing it, creating drag that puckers the seam. Test: run a fingertip along the tip—it should feel smooth, not jagged. Replace the needle if it fails; if puckering persists with a fresh needle, the mismatch is elsewhere (thread weight, needle size, or tension).
Bobbin Case
Lint buildup inside the case jams the thread path, causing erratic tension. Clean it with a lint-free cloth and a soft brush. If the tension spring feels loose or the finger is broken, the case can no longer regulate thread flow—replace it. The test: thread the bobbin case and pull the thread. It should offer steady resistance; if it slips or snaps free, the spring is worn.
Presser Foot
If fabric drags even after maxing out the pressure dial, the foot’s sole may be polished smooth or the hinge is sloppy. Test with a new foot if you have one; if the drag disappears, the old foot is worn. No spare? Sew a scrap with the suspect foot and again with the pressure dial turned all the way up—if the drag remains, the foot is the problem.
Tension Discs
When thread slips out of the tension discs, the fabric pulls unevenly. Clean the discs with a lint-free cloth; if the issue persists, the discs may be grooved or the spring fatigued. The test: thread the machine and pull the thread manually. It should offer smooth, even resistance; if it jerks or slips, the discs are worn and need replacement.
Frequently Asked Questions
Why does my fabric pucker only on certain stitches (e.g., zigzag)?
Puckering on zigzag but not straight stitches is a feed mismatch. Zigzag widens the stitch footprint, so the feed dogs must cover more ground per stitch to keep fabric moving evenly. If they’re worn or the stitch length is too short for the width, the fabric bunches under the presser foot. Run the same zigzag on a scrap with the stitch length dialed up one notch—if the puckering stops, the feed dogs are the bottleneck.
Can the wrong bobbin cause puckering? How do I check?
A bobbin that’s too large or too small for the bobbin case forces the hook to catch the thread loop at the wrong moment, pulling fabric unevenly. Check the class printed on the bobbin’s edge (e.g., “Class 15”) and match it to the class stamped on the bobbin case or in your manual. If the bobbin wobbles or rattles when seated, it’s the wrong size—replace it with the class your machine expects.
Does thread weight affect puckering? How do I match thread to fabric?
Thread that’s too heavy for the fabric resists pulling through the tension discs, creating drag that puckers the seam. Match thread weight to fabric weight: fine threads for lightweight fabrics, medium for quilting cotton, and heavy for denim or canvas. Test on a scrap—if the thread leaves visible holes or the fabric gathers, step down a weight.
Why does puckering happen on thick fabrics but not thin ones?
Thick fabrics require more force to feed evenly, and if the presser foot pressure is set for lightweight material, the feed dogs can’t grip the stack. The symptom is puckering that worsens as the layers increase. Turn the pressure dial up one click at a time while sewing the same stack—stop when the fabric moves smoothly without dragging.
How do I know if my presser foot pressure is too high or too low?
Too-high pressure flattens the fabric, slowing feed and causing puckering; too-low pressure lets the fabric slip, creating uneven stitches. Test by sewing a scrap with the pressure dial at its midpoint, then turn it down one click. If the fabric feeds more smoothly, the pressure was too high. If it slips, turn it back up. The right setting leaves the fabric moving steadily without distortion.
Final Thoughts: The 30-Second Puckering Checklist
Puckering isn’t random—it’s a mechanical signal your machine sends when stitch formation breaks down. Before you adjust anything, run these five checks in order. Each one rules out a common cause, and each takes less than a minute.
-
Test tension on scrap fabric Sew a straight line, then adjust top tension in 0.5 increments. If the pucker lessens, the tension was the culprit. If it worsens or shifts to the other side, the bobbin tension may need matching. The scrap tells you when to stop—no manual required.
-
Swap the needle A bent or blunt needle drags fabric instead of piercing it, distorting the stitch. Replace it with a new universal needle and sew the same scrap. If the pucker disappears, the old needle was the issue. If not, move on.
-
Inspect the feed dogs Turn the handwheel by hand and watch the fabric move. Does it feed evenly, or does it hesitate or bunch? Worn feed dog teeth skip stitches, pulling fabric into puckers. If they’re smooth or missing teeth, they need replacing—not adjusting.
-
Clean the bobbin case Lint buildup in the bobbin case disrupts thread flow, creating uneven tension. Remove the case, brush out debris, and reassemble. If the pucker persists, the case itself may be worn or damaged—test with a known-good replacement.
-
Match the thread Different threads behave differently under tension. Use the same thread in both top and bobbin, then sew the scrap again. If the pucker smooths out, the mismatch was the problem. If not, the issue lies deeper in the stitch chain.
If puckering still appears, the next step is hook timing (see Section 6). If that checks out, consult a technician—some wear patterns only show up under load, and forcing an adjustment can make things worse. The key is to test systematically, not guess. The machine will tell you what’s broken if you listen.
Next step: For a foolproof way to match the right tools to your project—and prevent puckering before it starts—grab the reference guide that turns confusion into confidence. decode presser feet, bobbins, and needles for perfect stitches
Keep reading
Want to go deeper? Read our guide on 7 Mechanical Causes of Skipped Stitches on a Sewing Machine.