How a Sewing Machine Bobbin Winder Works: The 5 Key Mechanics
Photo by No machine-readable author provided. Med assumed (based on copyright claims). on Wikimedia Commons (CC BY 2.5)
If you’ve ever wondered how a sewing machine bobbin winder works, it’s a precise system that spools thread onto a bobbin at a steady angle and consistent tension—essential for balanced stitches later. It only engages when the bobbin is seated correctly; if not, it disengages automatically to prevent damage. Five key parts drive the process: the drive wheel spins the winder shaft, the tension disc regulates thread pull, the clutch assembly controls engagement, and the bobbin stop halts winding precisely. Proper winding tension must match the upper thread’s tension to keep stitches even and fabric smooth. While modern machines use this same system, many vintage models rely on a simpler, manual clutch instead.
Part of our complete guide: for the full picture, see What Causes Seam Puckering When Sewing? The Mechanical Breakdown.
Key Takeaways
Here’s what you need to know before looking at the mechanics:
- The bobbin winder engages only when the bobbin is properly seated—no bobbin, no winding.
- Five core components (drive wheel, winder shaft, tension disc, clutch, bobbin stop) work in sync to wind thread evenly.
- Thread tension during winding must be lower than the upper thread tension to prevent stitching issues.
- The wind angle (5–10° tilt) prevents thread tangles by creating a spiral, not a vertical stack.
- Common failures (clutch slippage, bent shaft, misaligned stop) have specific symptoms you can diagnose without tools.
What to Check Before You Choose
Here’s the one decision table you need to evaluate any bobbin winder—no product names, no prices, just the criteria that decide whether it will work for you.
| Criterion | Why it decides the outcome | How to check it yourself | Red flag |
|---|---|---|---|
| Clutch engagement | A worn or misaligned clutch won’t lock the winder shaft when the bobbin is seated, so the bobbin won’t spin. | Press the winder pedal or flip the switch with an empty bobbin holder—listen for a sharp click and feel the shaft lock. | The shaft spins freely without the bobbin seated, or chatters instead of locking cleanly. |
| Bobbin-stop function | Without a working stop, the bobbin over-winds, jamming the thread and potentially damaging the shaft. | Wind a bobbin until it’s nearly full; the winder should halt automatically before the thread spills over. | The winder keeps spinning after the bobbin is visibly full, or the stop feels loose or bent. |
| Tension-disc calibration | If the disc’s spring pressure is off, the thread winds too loose (tangles) or too tight (deforms). | Wind a test bobbin, then gently pull the thread tail—it should unspool smoothly without kinking or snapping. | The thread either spills off the bobbin or feels like it’s cutting into itself when pulled. |
| Winder-shaft alignment | A bent or worn shaft causes the bobbin to wobble, throwing off tension and creating uneven coils. | Spin the empty bobbin holder by hand—watch for side-to-side play or a visible wobble. | The bobbin holder wobbles noticeably or the shaft feels gritty when rotated. |
| Wind-angle geometry | A vertical wind stacks thread rigidly, leading to jams; a slight tilt prevents layer binding. | Hold a freshly wound bobbin up to the light—thread layers should overlap like shingles, not stack straight. | Thread layers stack perfectly vertical, or the bobbin looks lopsided after winding. |
| Drive-wheel grip | A slipping drive wheel slows or stalls the winder, even when the motor runs at full speed. | With the machine off, rotate the handwheel by hand—feel the winder shaft turn smoothly without hesitation. | The winder shaft lags or stutters when the handwheel turns, or the belt looks shiny/worn. |
The 5 Core Parts That Make the Bobbin Winder Work
Every bobbin winder is a tight system of rotating and resisting parts that must work in sync. These five components do the heavy lifting when you flip the switch or press the pedal:
1. Drive Wheel
The drive wheel is the first link in the power chain. It sits against the main motor pulley (belt-driven) or on a direct coupling, spinning at the same speed as the motor. Its single job: transfer that rotation to the winder shaft without slipping. If the belt wears shiny or the coupling wobbles, the winder slows or stalls even when the motor runs normally.
Key details:
- Material matters: Rubber or cork drive wheels grip better than metal but wear faster.
- Belt tension: A loose belt causes slippage; a too-tight belt wears out faster.
- Alignment check: The drive wheel should sit flush against the winder shaft—no visible gap or wobble.
2. Winder Shaft
The winder shaft is the spinning spindle that holds the empty bobbin. It threads the bobbin onto its carrier and spins it fast enough to lay thread neatly across the flange. When the shaft is bent or the bushing wears oval, the bobbin can wobble, throwing off tension and creating loops that jam the race.
How to test it:
- Visual check: Hold the shaft at both ends—any bend or play indicates wear.
- Rotation test: Spin the shaft by hand; it should turn smoothly without resistance.
- Bobbin fit: The bobbin should slide onto the shaft without wobbling.
3. Tension Disc
Thread tension during winding is set by the tension disc—a spring-loaded pair of washers that squeeze the thread just enough to prevent over-tight or loose coils. Too loose and the thread spills; too tight and it cuts into the bobbin like a knife. The disc’s spring tension is adjustable, but the real test is the feel of the thread on the bobbin when you stop—it should unwind smoothly without kinking.
Adjustment tips:
- Clean first: Lint or thread buildup on the disc alters tension—brush it off before testing.
- Thread weight: Heavier threads (e.g., 30wt) need less tension than lighter ones (e.g., 60wt).
- Symptom guide:
- Loose coils? Increase tension (if adjustable).
- Thread cutting? Decrease tension or switch to a lighter thread.
4. Clutch Assembly
The clutch lives where the winder shaft meets the drive wheel. It engages only when the bobbin is seated against a solid surface—usually the bobbin stop or the winder’s own spring-loaded plate. Press the pedal or flip the switch and the clutch ratchets into place, turning the shaft. Remove the bobbin and the clutch releases, stopping the winder instantly. A worn clutch slips or chatters; a misaligned one won’t engage at all.
Troubleshooting:
- No engagement? Check for bent linkage or a weak spring.
- Slipping? Clean the clutch surface with alcohol and roughen it lightly with sandpaper.
- Vintage machines: Cork or rubber clutch wheels wear out—replace with the same material (check your manual).
5. Bobbin Stop
The bobbin stop is the safety that prevents over-winding. It’s a small pin or plate that the bobbin’s flange eventually contacts as it fills. When that happens, the stop halts the winder by disengaging the clutch or lifting the drive wheel off the shaft. If the stop is bent, missing, or set too far back, the bobbin can keep spinning and the thread piles up in a tangled mess on the shaft.
Adjustment guide:
- Too early? Bend the stop lever slightly outward (use needle-nose pliers).
- Too late? Bend it inward or check for a loose screw.
- Visual test: The stop should touch the bobbin flange before the thread reaches the edge.
How the Bobbin Winder Engages: The Mechanical Sequence
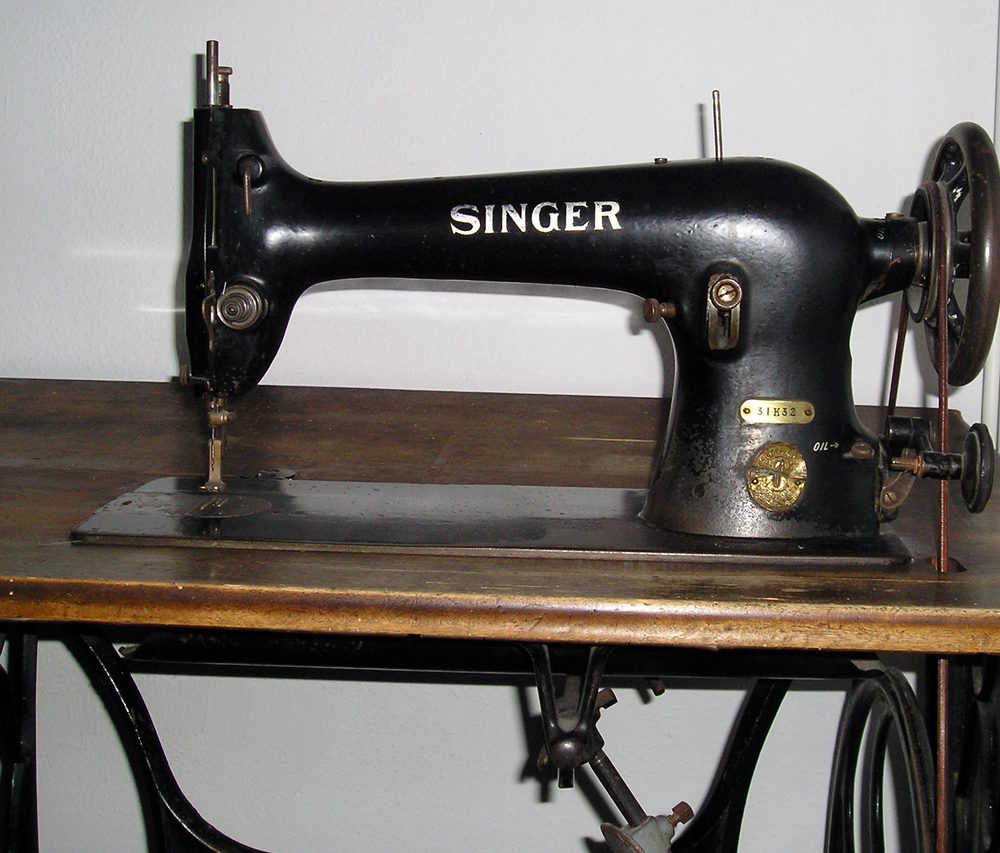 Photo by Vincent de Groot - http://www.videgro.net — source
The bobbin winder doesn’t spin continuously—it’s a precise clutch mechanism that only activates when every component is ready. When you press the winder pedal or flip the switch, power moves from the machine’s main drive to the handwheel via the belt. But here’s where the winder’s sequence begins: the handwheel’s motion only transfers to the winder shaft when the bobbin is properly seated in its holder. No bobbin? No winding.
Step-by-Step Engagement:
- Bobbin seated: The bobbin’s flange presses against the clutch plate, locking the shaft.
- Clutch engages: The drive wheel grips the winder shaft, transferring rotation.
- Thread tension: The tension disc pulls thread evenly from the spool.
- Wind angle: The shaft’s tilt (5–10°) creates a spiral, not a vertical stack.
- Auto-stop: The bobbin stop disengages the clutch when full.
Why it matters:
- Precision timing: The clutch only locks when the bobbin is fully seated—no partial engagement.
- Thread path: The guide ensures thread feeds straight to the bobbin, preventing tangles.
- Safety: The auto-stop prevents over-winding, which can damage the shaft or jam the thread.
The Science Behind Thread Tension During Winding
Thread tension during bobbin winding isn’t just about keeping the spool neat—it’s a precise mechanical balance that determines whether your stitches will lock cleanly or tangle mid-seam. The winder’s tension disc applies just enough pressure to coil thread evenly around the bobbin without distorting it, but not so much that the thread cuts into itself or resists unspooling later. Get this wrong, and the consequences show up in skipped stitches, thread nests, or bobbins that jam before they’re half-empty.
Why Winding Tension Must Be Lower Than Upper Thread Tension
The winder’s tension disc is calibrated to deliver slightly less resistance than the machine’s top tension assembly. This intentional mismatch ensures the bobbin thread can feed smoothly when sewing begins, without fighting the needle thread for dominance. If winding tension equals or exceeds upper tension, the bobbin thread will either refuse to unspool or snap under the strain of the first stitch. The result? A seam that puckers, skips, or—worse—locks up entirely mid-project.
Key numbers:
- Ideal ratio: Winding tension should be 10–20% lower than upper thread tension.
- Test method: Wind a bobbin, then sew a test seam. If the bobbin thread loops on the underside, winding tension is too low.
The Physics of Too Much or Too Little Tension
| Issue | Symptom | Cause | Fix |
|---|---|---|---|
| Too much tension | Thread cuts into itself, bobbin jams | Disc pressure too high, heavy thread | Clean disc, use lighter thread |
| Too little tension | Loose coils, thread spills | Disc pressure too low, worn clutch | Adjust tension (if possible), replace clutch |
| Uneven tension | Bobbin spins unevenly | Bent shaft, misaligned guide | Straighten shaft, check thread path |
How the Winder’s Tension Disc Adapts to Thread Weight
The tension disc on most domestic winders is engineered to accommodate standard thread weights—typically 40wt or 50wt—without manual adjustment. The disc’s spring-loaded pressure is set to compress just enough to grip these weights evenly, but it’s not infinitely flexible. Heavier threads (30wt or below) can overwhelm the disc’s default setting, requiring a lighter touch or even a machine with an adjustable winder tension dial.
Compatibility guide:
- Standard threads (40–60wt): Work with most discs without adjustment.
- Heavy threads (30wt or less): May require a machine with adjustable tension or a slower winding speed.
- Fine threads (60wt+): Often need slightly higher tension to prevent slippage.
The Symptom Check: How to Spot Tension Issues Before Sewing
Diagnosing winding tension problems doesn’t require a gauge—just a scrap of fabric and a few stitches. Wind a test bobbin, then sew a straight seam. Use these cues:
- Bobbin thread loops on underside? → Winding tension too low.
- Fabric puckers or thread snaps? → Winding tension too high.
- Thread feeds unevenly? → Clutch or shaft issue.
Pro tip: If your machine lacks an adjustable tension disc, match the thread weight to the bobbin’s capacity. Check the bobbin packaging—it often lists compatible thread weights.
Why the Wind Angle Matters: Preventing Tangles and Jams
A bobbin that winds at a perfect right angle looks tidy—but it’s a mechanical trap. The thread stacks vertically, layer upon layer, creating a rigid cylinder that resists unspooling smoothly. When the machine pulls thread from a bobbin wound this way, the layers catch on each other, leading to uneven tension, skipped stitches, or outright jams mid-seam. The fix isn’t tighter tension or a different thread; it’s geometry.
The Ideal Wind Angle: 5–10° Tilt
Most modern machines solve this by tilting the winder shaft 5–10 degrees off vertical. That slight diagonal forces each new layer of thread to overlap the one below it like shingles on a roof, distributing tension evenly and preventing the stack from binding.
How to check your machine’s angle:
- Wind a bobbin and hold it up to the light.
- Look for a spiral pattern—layers should overlap, not stack straight.
- If layers are vertical, the shaft may be bent or misaligned.
Common Wind Angle Issues
| Problem | Symptom | Cause | Fix |
|---|---|---|---|
| Vertical wind | Thread jams, bobbin spins unevenly | Shaft not tilted, worn guide | Adjust shaft angle (if possible), clean guide |
| Loose coils | Thread spills, bobbin underfills | Too little tension + wrong angle | Increase tension, check thread path |
| Tight coils | Thread cuts into itself | Too much tension + steep angle | Decrease tension, straighten shaft |
Vintage vs. Modern Winders
- Modern machines: Often have adjustable shafts or built-in tilt.
- Vintage machines: May require manual adjustment—check the service manual for exact specs.
- DIY fix: If your shaft isn’t adjustable, wind slower to let the thread settle into the correct angle.
Common Bobbin Winder Failures and How to Diagnose Them
A bobbin winder that misbehaves isn’t broken—it’s telling you exactly where the mechanism is failing. The symptoms map cleanly to the five core parts: clutch, shaft, tension disc, bobbin stop, and drive belt. Start with what the machine is doing, not with what you assume is wrong.
1. Winder Won’t Engage
Symptoms:
- Pressing the pedal does nothing.
- The winder runs but the bobbin doesn’t spin.
Diagnosis:
- Clutch issue: The clutch isn’t locking the shaft.
- Bobbin not seated: The flange isn’t pressing against the clutch plate.
- Electrical issue: The pedal or switch isn’t sending power.
Fix:
- Check bobbin placement: Ensure the flange clicks into the groove.
- Test clutch manually: Turn the handwheel—does the shaft lock?
- Inspect wiring: If the winder runs but doesn’t engage, the clutch solenoid may be faulty.
2. Thread Tangles on the Bobbin
Symptoms:
- Thread piles up unevenly.
- Bobbin spins but thread doesn’t wind neatly.
Diagnosis:
- Tension disc dirty or worn: Lint or thread buildup alters tension.
- Wrong wind angle: Thread stacks vertically instead of spiraling.
- Misaligned guide: Thread isn’t feeding straight to the bobbin.
Fix:
- Clean the tension disc with a dry brush.
- Check the thread path—thread should feed straight to the bobbin.
- Adjust the shaft angle if possible (or wind slower).
3. Bobbin Overfills or Underfills
Symptoms:
- Bobbin stops too early (underfills).
- Thread spills over the edge (overfills).
Diagnosis:
- Bobbin stop misaligned: Triggering too soon or too late.
- Worn bobbin: A cracked or warped bobbin can fool the sensor.
- Clutch slippage: Bobbin spins but doesn’t fill evenly.
Fix:
- Adjust the stop lever (bend slightly with pliers).
- Check the bobbin for damage—replace if cracked.
- Clean the clutch if it’s slipping.
4. Thread Slips Off the Bobbin
Symptoms:
- Thread unwinds easily after winding.
- Bobbin feels loose or uneven.
Diagnosis:
- Clutch worn out: Not gripping the shaft firmly.
- Bent winder shaft: Causes uneven tension.
- Thread too light: Not enough friction to hold.
Fix:
- Replace the clutch if worn (check for glaze or cracks).
- Straighten the shaft if bent (or replace it).
- Use heavier thread if the bobbin is too small.
5. Winder Runs but Doesn’t Wind
Symptoms:
- The winder motor spins, but the bobbin doesn’t turn.
- Thread feeds but doesn’t wind onto the bobbin.
Diagnosis:
- Slipping drive belt: Not transferring power to the shaft.
- Broken clutch linkage: Not engaging the shaft.
- Jammed thread path: Thread caught in the guide.
Fix:
- Check the belt tension: Adjust or replace if loose.
- Inspect the clutch linkage: Ensure it’s not bent or broken.
- Clear the thread path: Remove any lint or debris.
How to Wind a Bobbin Like a Pro: A 6-Step Mechanical Guide
Winding a bobbin isn’t about speed—it’s about letting the machine’s mechanics do the work precisely. The winder’s tension disc, guide, and clutch work together to lay thread evenly, but the operator’s role is to set up the thread path and let the motor do its job. Skip the manual guiding; the winder’s job is to stack thread tightly and uniformly, not to chase a wobbling spool.
Step 1: Thread from Spool to Tension Disc, Then to the Winder Guide
Goal: Ensure thread feeds smoothly without resistance. How to do it:
- Place the spool on its stand so thread feeds off the top.
- Run thread through the machine’s upper thread path until it reaches the tension disc.
- Guide thread through the winder guide (small metal loop or hook).
- Pro tip: Keep the spool upright—tilting it can cause uneven tension.
Step 2: Load the Bobbin and Position the Thread Tail
Goal: Secure the first layer of thread. How to do it:
- Slide the empty bobbin onto the winder spindle—it should spin freely.
- Hold 3–4 inches of thread tail between your fingers.
- Why it matters: The tail anchors the first coils, preventing slippage.
Step 3: Engage the Winder Only After Setup
Goal: Let the clutch engage properly. How to do it:
- Press the winder pedal only after the bobbin is loaded and thread is in place.
- Common mistake: Pressing too early causes loose or uneven starts.
- Test: Listen for a click—that’s the clutch locking.
Step 4: Let the Winder Do the Work
Goal: Avoid manual interference. How to do it:
- Do: Let the machine wind at its own speed.
- Don’t: Pull the thread or adjust its angle—this disrupts the stack.
- Symptom of interference: Uneven coils or thread tangles.
Step 5: Stop Before the Bobbin Edge
Goal: Prevent over-winding. How to do it:
- Stop when thread is ⅛ inch from the bobbin’s edge.
- Why? Overflowing thread creates a rigid cylinder that jams.
- Visual cue: The auto-stop should disengage automatically.
Step 6: Secure, Trim, and Remove
Goal: Ensure the bobbin is ready for sewing. How to do it:
- Lift the thread tail and tug gently—it should hold firm.
- Trim the tail close to the bobbin.
- Remove the bobbin and spin it between your fingers—it should rotate smoothly.
- Final check: No loose loops or uneven tension.
Frequently Asked Questions
Why does my bobbin winder stop before the bobbin is full?
The winder’s auto-stop isn’t a timer—it’s a mechanical sensor that trips when the bobbin reaches a set diameter. On most machines, that sensor is a small lever or spring-loaded arm that rides against the bobbin as it fills. If the arm is bent, sticky, or misaligned, it can trigger the stop too soon.
How to fix:
- Clean the sensor point with a dry brush.
- Check for wear on the bobbin itself (cracks or warping can fool the sensor).
- Pro tip: If the stop triggers at the same spot every time, the issue is mechanical, not electrical.
How do I adjust the tension on a bobbin winder if my machine doesn’t have an adjustment screw?
Thread tension during winding is set by the friction between the thread and the bobbin’s own surface—no screw required. The trick is to control the angle at which the thread feeds onto the bobbin.
Workaround:
- Guide the thread through the machine’s built-in thread guides.
- Pull a 6-inch tail through the bobbin’s hole and hold it taut as you start winding.
- Keep light, even pressure on the tail until the first few layers lock the thread.
- If tension is still off: The issue may be a worn clutch or a bobbin that’s the wrong class for your machine.
Can I use any thread on a bobbin winder, or does it need to match the upper thread?
The winder doesn’t care what thread you use—it’s blind to fiber, weight, or brand. What matters is that the thread’s diameter matches the bobbin’s capacity.
Compatibility rules:
- Heavy threads (30wt or less): Fill bobbins faster; may trigger the auto-stop early.
- Fine threads (60wt+): Wind loosely; may collapse when sewing.
- Test method: Wind a bobbin, tug the thread—if it feels spongy or slips, the thread is too fine for the bobbin.
What’s the difference between a horizontal and vertical bobbin winder?
The difference is in how the bobbin sits while it winds.
| Feature | Horizontal Winder | Vertical Winder |
|---|---|---|
| Bobbin position | Flat (thread spirals) | On edge (thread stacks vertically) |
| Common in | Domestic machines | Vintage/industrial machines |
| Tangle risk | Lower (spiral locks layers) | Higher (vertical stack can jam) |
| Symptom of issue | Uneven tension, skipped stitches | Thread jams, bobbin spins unevenly |
Why does my vintage sewing machine bobbin winder slip?
Vintage winders rely on a rubber or cork clutch wheel that grips the handwheel when you engage the winder. Over time, the clutch surface glazes over or wears smooth, so it spins without driving the bobbin.
Fix:
- Clean the clutch wheel with denatured alcohol and a soft cloth.
- Roughen the surface lightly with 600-grit sandpaper.
- Replace if cracked: Clutch wheels are sold by class (check your manual).
- Pro tip: The old wheel held against the new one will show the difference side by side.
Final Thoughts
The bobbin winder is one of those quiet, unglamorous mechanisms that keeps a sewing machine running—until it doesn’t. Its job is simple: wind thread onto a bobbin at the right tension, angle, and speed so the stitches that follow don’t tangle, skip, or jam. But like any mechanical system, it relies on precision. A misaligned shaft, a worn clutch, or an improperly threaded path can turn a routine task into a frustrating stall.
Key Takeaways for Troubleshooting:
- Start with the basics: Bobbin placement, thread path, and tension.
- Listen for clues: A click means the clutch engaged; no sound means it didn’t.
- Visual checks: Hold the bobbin up to the light—does the thread spiral or stack?
- Service manuals are your friend: They spell out exact adjustments for your machine.
- When in doubt, clean first: Lint and thread buildup cause more issues than you’d think.
For deeper problems, a technician’s eye can spot wear or misalignment that’s invisible to the untrained. The bobbin winder may be a small part of the machine, but it’s a critical one—treat it that way, and your stitches will thank you.
Keep reading
Want to go deeper? Read our guide on How the Take-Up Lever Builds Every Stitch: The 3 Hidden Mechanics.