Upper Tension vs Bobbin Tension Explained
Key Takeaways
Upper and bobbin tension aren’t interchangeable—they work on opposite sides of the same stitch. Upper tension controls how much thread the machine pulls from the spool to form the top half of the lockstitch. Bobbin tension, on the other hand, regulates how much thread the hook pulls from the bobbin to complete the bottom half.
Start with upper tension first—it’s the primary control for stitch balance and easiest to fine-tune without disassembly. Only move to bobbin adjustment when upper tension changes don’t fix the issue. Bobbin tension adjustments are reserved for stubborn problems like uneven stitches, loops on the underside, or skipped stitches—issues that persist even after upper tension has been corrected.
The two systems must work in harmony, but they don’t always reveal the problem clearly. Too much bobbin tension can mimic too little upper tension (and vice versa), so always diagnose systematically using a scrap test on the same fabric and thread you’ll use for your project. Dial numbers alone don’t account for material thickness, fiber stiffness, or thread weight—the real factors that throw off your tension settings.
Test your adjustments immediately on a scrap. If the stitches still misbehave after you’ve ruled out mechanical issues, the problem likely isn’t tension at all.
How Upper Tension and Bobbin Tension Differ Mechanically
Upper tension and bobbin tension aren’t two versions of the same control—they act on opposite sides of the stitch, each regulating a distinct phase of the lockstitch cycle.
The Upper Tension System: How the Machine Feeds the Needle
Upper tension is a braking mechanism applied to the thread as it leaves the spool. Two spring-loaded discs—visible on the machine’s faceplate—clamp the thread between them, creating friction. The dial or digital setting adjusts the compression of those discs, which in turn controls how much thread the machine can pull from the spool during each stitch cycle. Tighten the discs, and the thread resists; loosen them, and it flows more freely. This resistance determines the length of the upper thread loop that the hook will catch—too little resistance and the loop is slack, too much and the thread snaps.
The Bobbin Tension System: How the Hook Pulls the Bobbin Thread
Bobbin tension, in contrast, regulates the thread as it’s unwound from the bobbin by the hook. On front-loading machines, a small screw on the bobbin case compresses a spring that presses against the bobbin’s rim; on drop-in bobbins, the tension is pre-set by the case’s design. When the hook rotates, it pulls the bobbin thread upward through the fabric. The tension screw controls how much resistance the bobbin thread encounters as it leaves the case—too loose and the thread spills out in loops, too tight and it refuses to yield, causing the upper thread to pull the bobbin thread all the way to the fabric’s surface.
The Dynamic Between the Two
The two systems interact in real time: the hook’s motion pulls the bobbin thread, but the upper tension determines how much thread is available to be pulled. If upper tension is too high, the hook can’t draw enough bobbin thread to meet it at the fabric’s midpoint, resulting in stitches that pucker or break. If bobbin tension is too low, the hook pulls more thread than the upper tension allows, creating loops on the underside. Upper tension is the primary control because it’s adjustable on the fly and affects the entire stitch cycle, while bobbin tension is a secondary fine-tune—used only after upper tension has been ruled out or when the symptom is clearly bobbin-side, like consistent looping on the underside of the fabric.
When to Adjust Upper Tension vs Bobbin Tension: A Diagnostic Flowchart
Start here: upper tension is the first place to look for any stitch imbalance. It’s the most adjustable part of the system—no tools needed, just turn the dial—so it’s always the easiest test. If the top thread isn’t pulling the bobbin thread up to the fabric’s midpoint, or if you see thread breaking or skipped stitches, increase upper tension gradually while sewing a scrap of the same material. Stop at the first setting where the stitches sit balanced—neither pulling the bobbin thread to the top nor leaving it buried on the underside.
Only move to bobbin tension if upper tension adjustments don’t fix the issue. The bobbin tension system is harder to access, harder to measure, and far less forgiving—so use it only when you see clear signs of its involvement. Three symptoms tell you it’s time to adjust bobbin tension:
- Thread nests on the underside of the fabric, forming a messy loop instead of a clean stitch.
- The bobbin thread isn’t pulling up evenly, leaving loose loops or inconsistent coverage on the top side.
- The bobbin case jumps or feels erratic during sewing, indicating the tension spring isn’t holding the thread evenly.
Use the scrap test to isolate the problem before you touch a single dial. Sew a few inches of your material at your usual settings, then flip the fabric over. If the upper thread is showing too much on the underside, increase upper tension. If the bobbin thread is showing too much on top, increase bobbin tension. If neither adjustment works, the issue isn’t tension—it’s likely mechanical, like a bent needle, wrong needle size for the fabric, or feed dog misalignment.
What to do next
- If the problem clears within one or two adjustments, stop. Over-tightening either tension will cause new issues.
- If the problem persists after both adjustments, step back to basics: check the needle condition, thread path, and bobbin case seating. A mechanical issue often mimics a tension problem—especially if the stitches are skipping or the thread keeps breaking.
- If the bobbin thread is still looping despite correct upper tension, avoid guessing the screw turns. Instead, perform the thread pull test: with the machine empty and the presser foot up, hold the bobbin thread lightly—it should pull out with a slight but steady resistance. Too easy? Increase bobbin tension. Too hard? Decrease it.
How to Adjust Bobbin Tension Without Guessing the Screw Setting
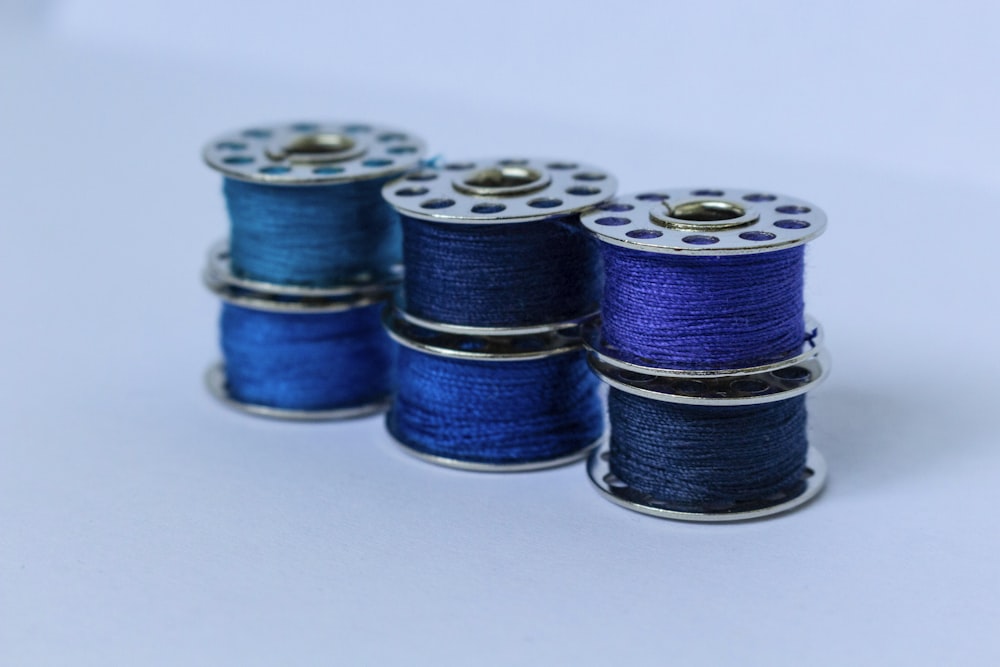 Photo by Julia Maior on Unsplash
Bobbin tension isn’t a dial you turn—it’s a screw you nudge, and the only feedback you get is what the thread does when you pull it. The screw sits on the bobbin case, usually a small slotted head that turns clockwise to tighten (increase tension) and counterclockwise to loosen (decrease tension). But the screw itself doesn’t tell you when it’s right; the thread does.
The Thread Pull Test: Your Only Gauge
Hold the bobbin case by the thread tail and let it hang. A correctly tensioned bobbin should drop slowly when you give the thread a gentle tug—too fast, and the tension is too loose; not at all, and it’s too tight. This test works because it mimics the resistance the thread feels as it feeds through the hook race. No dial, no spec sheet, just the thread’s behavior.
Bobbin cases differ by machine type. Front-loading cases (the kind you drop into a side door) often have adjustable screws, while drop-in cases (the kind that sit in a top-loading basket) may have pre-set tension. Vintage machines sometimes use a fixed-tension case—if yours does, the manual will say so. Never adjust a pre-set case without confirming it’s designed to be tweaked.
Adjusting in Small Steps
Turn the screw in 1/8-turn increments. After each adjustment, run the thread pull test again. If the bobbin thread still loops on the underside of your scrap fabric, tighten the screw slightly. If the upper thread shows on the underside, loosen it. The goal isn’t a specific screw position—it’s a balanced stitch.
Overtightening the screw can strip the threads or warp the case. If the screw feels stiff, stop. Some cases use a tiny spring under the screw; forcing it can snap the spring or misalign the case. If you’re unsure, test on a scrap first—better a ruined scrap than a ruined case.
Why Upper Tension Adjustments Fix Most Stitch Problems (And When They Don’t)
Upper tension isn’t just another dial—it’s the machine’s primary control for stitch balance. Every lockstitch begins with the needle thread, and upper tension regulates how much of it the machine feeds into the stitch. Too loose, and the thread loops on the underside; too tight, and it snaps before the stitch completes. Because the dial adjusts pressure on the tension discs without tools or disassembly, it’s the first and safest place to troubleshoot any stitch irregularity.
The discs themselves are simple: two metal plates that pinch the thread as it passes between them. The dial increases or decreases that pinch, changing how much resistance the thread meets on its way to the needle. That resistance is what determines whether the stitch locks at the right depth in the fabric. Most skipped stitches, thread nests, and breakage start here—not because the discs are faulty, but because the pressure no longer matches the thread weight or fabric thickness.
But upper tension has limits. It can’t compensate for a bobbin case whose spring is bent, a needle that’s dull or bent, or lint packed into the bobbin race. Those problems disrupt the stitch mechanically, and no dial setting will fix them. If you’ve turned the upper tension dial through its full range and the stitch still misbehaves, the issue is almost always downstream: bobbin tension, hook timing, or feed dogs. Those require a closer look—tools, cleaning, or a service manual. The dial is the first test, not the only one.
How to Test Whether Your Tension Adjustments Worked (Without Relying on Dial Settings)
The only test that matters is the one you can see and feel: the scrap test. Dial numbers are starting points, but the actual stitch balance depends on thread weight, fabric thickness, and even needle size. A setting that works for one project can throw the balance on another. Your eyes and fingers — not the tension dial — are the final judge.
Start with a scrap of the fabric and thread you’ll use in your project. Sew a straight line on it, then flip it over and examine both sides. The ideal stitch has upper and bobbin threads meeting exactly in the fabric’s center, with no visible loops or puckering on either side. If the upper thread pulls to the underside, the upper tension is too high — or the bobbin side is too loose. If the bobbin thread rises to the top surface, the upper tension is too low — or the bobbin side is too tight.
Use small adjustments and retest immediately. Turn the upper tension dial by one increment, or tweak the bobbin screw by a quarter turn, then sew another line. Repeat until the stitches disappear into the fabric’s center from both sides. Skip the temptation to “set it and forget it” — each fabric and thread combo can shift the balance, so recheck when you change materials or if the stitch suddenly looks off.
Upper Tension vs Bobbin Tension: Which One to Adjust for Common Stitch Problems
Stitch problems almost always trace back to one tension system over the other. Below, you’ll find a clear path to the right adjustment—and what to rule out before turning a dial.
| Symptom | Likely cause (Upper vs Bobbin Tension) | What to adjust first | Red flags (mechanical issues) |
|---|---|---|---|
| Upper thread breaking | Upper tension too high | Decrease upper tension | Burrs on the needle or tension discs |
| Bobbin thread looping on underside | Bobbin tension too loose | Tighten bobbin tension (or increase upper tension if bobbin is pre-set) | Incorrect bobbin threading or lint in bobbin race |
| Stitches uneven on both sides | Upper tension too loose | Increase upper tension | Needle size or thread weight mismatch |
| Skipped stitches | Upper tension too tight or bobbin tension too loose | Decrease upper tension or tighten bobbin tension | Hook timing out of sync or damaged needle |
| Fabric puckering | Upper tension too tight | Decrease upper tension | Feed dog misalignment or presser foot pressure too high |
Key insight: Upper tension is usually the first lever to pull—it’s adjustable at the dial and responds instantly. But if you’ve exhausted the dial and the problem persists, mechanical issues like hook timing or needle damage may be mimicking a tension imbalance.
Where to start: Run the scrap test on a piece of scrap fabric. If the issue persists after adjusting the correct tension system, pause before turning the dial again—instead, inspect the needle, bobbin case, and threading path for wear or lint.
Frequently Asked Questions About Upper and Bobbin Tension
Can I adjust bobbin tension on a drop-in bobbin system? Yes—if the bobbin case is removable. Most drop-in systems use a separate bobbin case that slides out, exposing the same tension screw found on front-loading cases. If the case is fixed (rare), tension is factory-set and unadjustable. The thread pull test still applies: hold the bobbin case by its thread tail and let it drop. If it descends slowly, tension is correct; if it falls or barely moves, adjust the screw in small increments until the drop is steady.
Why does my bobbin thread keep breaking even after adjusting tension? Bobbin thread breaks when tension is too tight or when the thread path is obstructed. First, rule out mechanical issues: check for burrs on the bobbin case, ensure the thread feeds smoothly from the bobbin, and confirm the bobbin spins freely in its case. If the thread still snaps, loosen the bobbin tension screw slightly and retest with the pull method—each quarter-turn changes the resistance noticeably.
How do I know if my bobbin case tension is pre-set? Pre-set cases have no visible screw or a sealed adjustment slot. Look for a smooth, uninterrupted surface on the case exterior. If you see a small slotted screw, the tension is adjustable. Factory-set cases are common in some vintage machines and budget models; if yours is pre-set, focus on upper tension and thread quality to balance stitches.
What’s the difference between top tension and upper tension? None—“top tension” and “upper tension” refer to the same system. The term “top” comes from the thread’s position in the machine, while “upper” describes its role in the lockstitch formation. Both regulate the needle thread’s resistance as it feeds through the tension discs.
Can I use the same tension settings for all fabrics? No. Thread weight, fabric thickness, and needle size all alter the ideal tension. Start with the machine’s default setting (usually marked on the dial), then run a scrap test: if the bobbin thread pulls to the top, increase upper tension; if the needle thread pulls to the bottom, decrease it. The scrap tells you when the balance is right—no chart can.
Why does my tension change when I switch thread brands? Thread brands vary in fiber content, finish, and twist, which affect how they interact with tension discs. A 40 wt thread from one brand may behave like a 50 wt from another. Always retest tension with a scrap when switching threads, even if the weight label matches. The symptom to watch for: loops on the underside or puckering on top.
Final Thoughts: The 30-Second Tension Checklist
Skip the manual—just run through this quick loop when stitches misbehave.
Start with upper tension. It’s the first dial to touch because most stitch problems trace back to it. If you’re seeing loops on the underside or loose stitches on top, turn the upper tension dial one notch tighter (or looser, if the bobbin thread is dominating). Test immediately on a scrap of the same fabric and thread you’re using. The scrap test tells you whether the balance is right—not the dial number.
Stick with upper tension until it fails. If adjusting it doesn’t fix the issue, move to bobbin tension—but only after verifying the upper tension is already set correctly for the material. Bobbin tension is trickier: adjust it incrementally using the thread pull test. Gently pull the bobbin thread—if it resists too much, loosen the screw a quarter-turn. If it feeds too freely, tighten it. Repeat until the thread pulls evenly, but not tightly.
Rule out mechanical gremlins. If tension adjustments don’t resolve the problem, pause. Check for lint buildup in the bobbin area, a bent or dull needle, or a misaligned hook. These issues mimic tension problems but won’t be fixed by turning a dial. Clean the machine, replace the needle, and recheck the hook timing if necessary.
Always test on the real fabric. Dial settings are approximations—your thread and material dictate the actual balance. If you skip the scrap test, you’re guessing twice: once when you adjust, and again when you sew.
Master this loop, and you’ll diagnose tension issues faster than you can thread the machine.
Keep reading
Keep exploring the topic with these related guides: