What Does a Walking Foot Do on a Sewing Machine
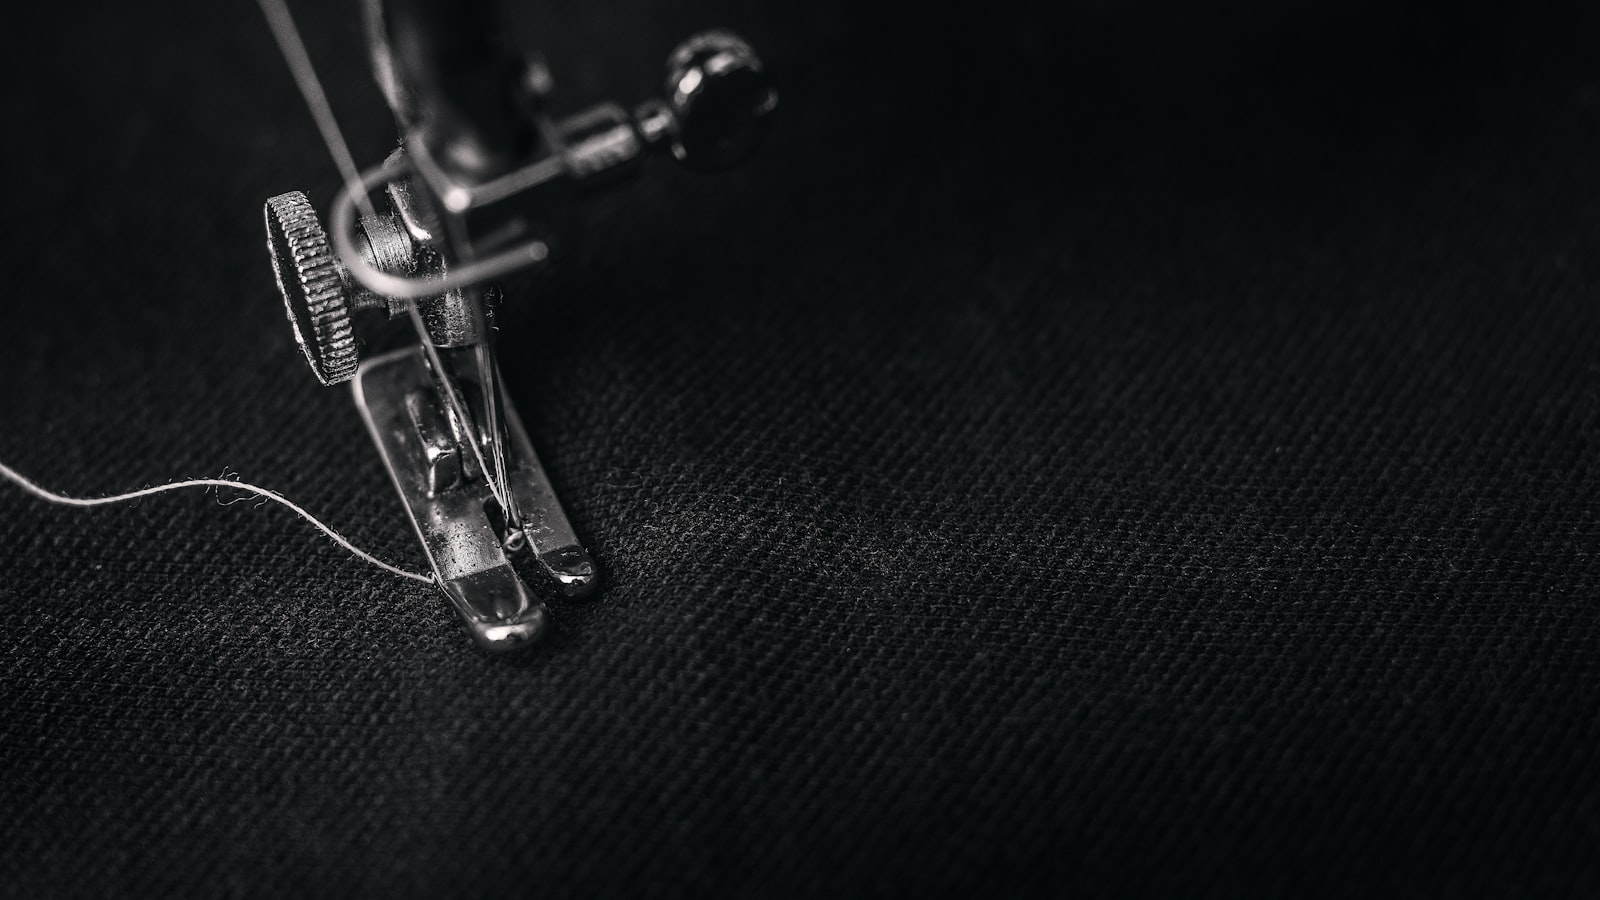
Photo by Alexander Andrews on Unsplash
Key Takeaways
A walking foot is a specialized sewing machine attachment that feeds fabric from the top while the feed dogs pull from the bottom, creating synchronized motion. This dual-feed action prevents layers from shifting or bunching when sewing thick materials, slippery synthetics, or uneven surfaces like quilts. Unlike standard presser feet, the walking foot’s built-in grippers engage with every stitch cycle, matching the feed dogs’ movement step-for-step.
Use a walking foot when:
- Your fabric layers slip, stretch, or shift unevenly under the standard presser foot
- You’re sewing thick stacks (denim, canvas, upholstery) or slippery materials (vinyl, satin, nylon)
- You need consistent alignment for long seams, quilting lines, or garment pieces
Key benefits:
- Prevents fabric drag on thick stacks
- Reduces shifting on slippery or layered fabrics
- Maintains even feed on challenging materials
- Increases efficiency by eliminating temporary basting or hand-stitching
Part of our complete guide: for the full picture, see What Causes Seam Puckering When Sewing? The Mechanical Breakdown.
What Does a Walking Foot Do on a Sewing Machine?
A walking foot solves the most common feeding problem in sewing: uneven movement between fabric layers. When you sew multiple layers—like quilt tops with batting, vinyl paired with cotton, or several denim plies—the feed dogs below pull the bottom layer forward, but the top layer often lags behind. This mismatch causes shifting, bunching, and puckering, especially on thick or stretchy materials.
The walking foot eliminates this discrepancy by feeding the top layer in sync with the bottom. Its built-in grippers engage with each stitch cycle, pulling the top layer forward in lockstep with the feed dogs. The result is smoother motion, cleaner stitches, and no layer creep—even on projects where alignment is critical.
When to Use a Walking Foot vs. Standard Presser Foot
| Scenario | Standard Presser Foot | Walking Foot |
|---|---|---|
| Single-layer sewing (cotton, linen) | ✅ Works well | ⚠️ Overkill |
| Thick stacks (denim, canvas, upholstery) | ❌ Layers shift | ✅ Essential |
| Slippery fabrics (vinyl, satin, nylon) | ❌ Fabric slides | ✅ Grips securely |
| Stretchy materials (knits, spandex) | ❌ Stretches unevenly | ⚠️ Limited help |
| Quilting (top + batting + backing) | ❌ Layers shift | ✅ Keeps alignment |
| Multiple layers (belts, bags, upholstery) | ❌ Drags and bunches | ✅ Feeds smoothly |
The walking foot doesn’t replace the feed dogs—it works alongside them to ensure both layers move together. Without it, even a slight shift in alignment can ruin a project, especially on long seams or precise garment pieces.
What to Check Before You Choose a Walking Foot
Before buying a walking foot, verify these five critical criteria to ensure it matches your sewing needs and machine. Skipping any of these checks risks misalignment, damage, or wasted money.
1. Grip Pattern on the Foot’s Underside
The grip pattern determines how securely the foot holds slippery or textured fabrics without shifting layers. Flip the walking foot over and inspect the pattern stamped or moulded into the underside:
- Coarse grooves: Best for heavy materials (denim, canvas, upholstery)
- Fine teeth: Ideal for delicate synthetics (nylon, satin, polyester)
- Smooth rubber pads: Suited for medium-weight fabrics (quilting cotton, lightweight synthetics)
Red flag: If the pattern is unclear or inconsistent, the foot may fail to grip properly, causing layers to slip mid-stitch.
2. Stack Thickness Your Project Requires
The foot’s grippers must fully engage with your fabric stack to prevent uneven feeding. Test your intended stack on a scrap of the same material:
- Measure the height from the feed dogs to the top of the stack
- Compare it to the walking foot’s travel height (visible as a gap between the foot base and fabric)
- If the stack exceeds the foot’s travel height, the grippers won’t catch, leading to uneven feeding
Pro tip: For extra-thick stacks (e.g., upholstery with foam), look for a walking foot with a taller base or adjustable pressure.
3. Shank Class Compatibility with Your Machine
The walking foot must physically fit your sewing machine’s presser bar. Walking feet come in shank classes:
- Low shank: Most domestic machines (Singer, Brother, Janome)
- High shank: Industrial machines, some Berninas
- Slant shank: Older models, specialty machines
How to check:
- Compare the walking foot’s shank class (printed on packaging or manual) to your machine’s shank type
- Measure the distance from the foot’s base to the top of the shaft if unsure
- Red flag: If the shank class mismatches, the foot may sit too high/low, causing the grippers to miss the fabric or collide with the feed dogs
4. Clearance in Your Machine’s Throat Area
Some walking feet won’t fit machines with built-in work lights, short-arm throats, or arm collisions. Test the foot on your machine:
- Slide the walking foot onto the presser bar without sewing
- Check if it wobbles, bottoms out, or interferes with the throat space
- Ensure the needle misses the hole by no more than a thread width
Red flag: If the foot doesn’t sit flush or interferes with the throat space, it’s incompatible, risking misalignment or breakage.
5. Fabric Type You Sew Most Often
The walking foot’s grip and base width must handle your typical materials:
- Heavy fabrics (denim, canvas, upholstery): Need aggressive grippers and a wide base
- Slippery synthetics (vinyl, satin, nylon): Require fine teeth or rubber pads
- Delicate fabrics (chiffon, silk): Use gentle grippers to avoid tearing
Pro tip: If you sew both heavy and delicate fabrics, keep two walking feet on hand and swap them as needed.
How a Walking Foot Works
A walking foot feeds fabric from the top while the feed dogs pull from the bottom, creating synchronized motion. The foot’s built-in set of grippers engages with each stitch cycle, matching the feed dogs’ movement step-for-step. This dual-feed action prevents layers from shifting out of alignment, even when they differ in texture or thickness.
The Mechanism Step-by-Step
- Stitch initiation: The feed dogs rise through the needle plate and advance the fabric upward.
- Gripper engagement: Simultaneously, the walking foot’s grippers descend and engage the top layer, pulling it forward in lockstep.
- Stitch completion: When the feed dogs retract, the grippers release, reset, and repeat the cycle.
This synchronized feeding eliminates the drag and bunching that occurs with thick layers, stretchy fabrics, or uneven surfaces like quilted materials or multiple fabric types.
Why It’s Better Than a Standard Presser Foot
Without a walking foot, the feed dogs may struggle to grip the top layer as effectively as the bottom one, causing layers to shift and create mismatched seams. The walking foot compensates for this by ensuring both layers move together, maintaining consistent stitch length and alignment.
Real-world example:
- Without a walking foot: Sewing a quilt top with batting causes the top layer to lag, resulting in puckered seams and uneven quilting lines.
- With a walking foot: The top layer feeds in sync with the bottom, producing flat, even seams with no shifting.
The walking foot’s advantage is clearest when sewing heavy materials, slippery synthetics, or multiple layers—where even a slight shift can ruin a project.
Benefits of Using a Walking Foot
 Photo by Iryna Marienko on Unsplash
A walking foot transforms how your sewing machine handles tricky fabrics by eliminating the most common causes of misalignment. Instead of relying on the feed dogs alone, the foot grips the material from above, syncing with the movement below. That single change prevents shifting, bunching, and uneven feeding—especially on bulky or slippery layers that normally resist controlled stitching.
1. Improved Fabric Handling and Reduced Drag
Layers that once fought each other—like quilt tops with batting, vinyl paired with cotton, or multiple denim plies—now move as one. The grippers on the foot engage with every stitch cycle, pulling the top layer forward in lockstep with the feed dogs. That coordinated motion cuts the drag that bends needles, jams presser bars, or forces you to wrestle the fabric through the machine.
Result:
- Smoother motion on thick stacks
- No fabric distortion or stretching
- Fewer skipped stitches from resistance
2. Enhanced Sewing Accuracy and Precision
When thick or slick materials refuse to stay put, even straight seams can wander off line. A walking foot keeps each layer exactly where it started, so seams stay parallel and corners stay sharp. That precision matters most on projects where accuracy equals quality:
- Long seams on upholstery
- Long quilting lines
- Garment pieces that have to meet without shifting
The foot doesn’t just reduce visible flaws; it removes the guesswork from maintaining consistent alignment.
3. Increased Efficiency and Productivity
Projects that used to demand multiple passes—basting layers temporarily, wrestling with pins, or resorting to hand basting—can now move straight from raw stack to finished seam. The walking foot lets you sew through:
- Heavy canvas
- Coated fabrics
- Multiple layers of upholstery
without slowing down or sacrificing quality. That efficiency isn’t just time saved; it’s:
- Fewer interruptions
- Fewer skipped stitches
- Less rework
Side-by-Side Comparison: With vs. Without a Walking Foot
| Metric | Without Walking Foot | With Walking Foot |
|---|---|---|
| Layer alignment | Uneven, shifting | Perfectly aligned |
| Stitch consistency | Inconsistent, puckered | Smooth, even |
| Needle deflection | Common | Rare |
| Project time | Slower (extra basting) | Faster (direct sewing) |
| Fabric stress | High (drag, bunching) | Low (synchronized feed) |
The walking foot’s advantages are easiest to see when you sew the same stack with and without it. The difference in alignment, drag, and stitch consistency becomes unmistakable.
Choosing the Right Walking Foot for Your Sewing Machine
A walking foot isn’t one-size-fits-all. The right one depends on:
- The fabrics you sew most often
- The thickness of those fabrics
- Whether the foot will even fit your sewing machine
Skip either of these checks and you’ll fight misalignment or worse—damage every time the motor cranks.
Match the Foot to the Fabric
Your walking foot’s grip pattern and base width must handle your typical materials:
| Fabric Type | Recommended Grip Pattern | Base Width | Shank Class |
|---|---|---|---|
| Heavy denim/canvas | Coarse grooves | Wide | Low or high |
| Slippery synthetics | Fine teeth or rubber pads | Standard | Low |
| Delicate fabrics | Gentle rubber pads | Narrow | Low |
| Quilting (cotton) | Medium teeth | Standard | Low |
| Upholstery (foam) | Aggressive grippers | Extra-wide | High |
Pro tip: If you sew both heavy and delicate fabrics, keep two walking feet and swap them as needed. The grip pattern is stamped or moulded into the foot’s underside—flip it over and look before you buy.
Think About Bulk, Not Just Weight
The thickness of your stack matters more than its total weight. Six layers of quilting cotton stack to about the same height as two layers of canvas, but the canvas fights back with more resistance.
Test your stack:
- Sew a scrap of the same material thickness
- Check if the foot bottoms out or the layers shift before the grippers can catch
- If yes, you need a taller or wider walking foot
Symptoms of an undersized foot:
- Layers creep apart mid-stitch
- Feed dogs pull unevenly
- Seams pucker or bunch
Confirm the Fit Before You Buy
Walking feet come in shank classes and sub-classes:
- Low shank: Most domestic machines (Singer, Brother, Janome)
- High shank: Industrial machines, some Berninas
- Slant shank: Older models, specialty machines
How to verify compatibility:
- Check your machine’s manual for the shank class
- Compare it to the foot’s packaging or manual
- Measure the old presser foot’s shank (distance from base to top of shaft)
Red flags:
- Foot sits too high/low on the presser bar
- Grippers miss the fabric or collide with feed dogs
- Needle misses the hole by more than a thread width
Quick compatibility test:
- Slide the walking foot onto the presser bar without sewing
- Check for wobble, bottoming out, or interference
- Turn the handwheel by hand—listen for scraping or clunking
Specialty Walking Feet for Unique Needs
| Foot Type | Best For | Key Features |
|---|---|---|
| High-shank walking foot | Industrial machines, thick stacks | Extra height for bulky layers |
| Extra-wide walking foot | Upholstery, heavy canvas | Wider base for stability |
| Low-profile walking foot | Short-arm machines, delicate fabrics | Compact design, gentle grip |
| Adjustable-pressure foot | Mixed fabric types | Customizable grip for different layers |
Example: If you sew upholstery with foam, a high-shank, extra-wide walking foot provides the grip and clearance needed for bulky stacks.
How to Use a Walking Foot: Step-by-Step Guide
Photo by Thomas Wolter on Unsplash
A walking foot turns your sewing machine into a tool that handles awkward layers without shifting or bunching. To make it work reliably, you need to tune three things:
- Tension
- Needle choice
- Care/maintenance
Each one changes how the foot grips and feeds the fabric—and skipping the setup will undo the foot’s main advantage.
Step 1: Install the Walking Foot Correctly
Tools needed:
- Walking foot (compatible with your machine)
- Scissors or thread snips
- Small screwdriver (if needed)
Installation steps:
- Remove the standard presser foot and needle plate cover
- Open the bobbin area to check for lint or obstructions
- Hook the walking foot’s presser bar onto the machine’s existing presser bar pin
- Slide the foot down until it seats firmly against the machine bed (most low-shank feet click into place)
- Reattach the needle plate cover (usually flips or screws back on)
Adjustments after installation:
-
Needle position: The walking foot’s arm must pass freely above the needle bar without contact. Turn the handwheel by hand and listen for scraping. If you hear it:
- Loosen the foot’s set screw
- Nudge the foot slightly back until the arm clears
- Tighten the screw securely
-
Presser foot pressure: Test on scrap fabric:
- If layers slide out of alignment, increase pressure gradually
- If you hear loud clunking, decrease pressure (over-tightening causes drag and can bend the foot’s arm)
Pro tip: Always test the fit on scrap fabric before starting a project. If the foot wobbles or the needle misses the hole, it’s not compatible.
Step 2: Set Tension for Optimal Performance
Tension isn’t a fixed setting—it’s a dial you adjust to the job. The walking foot’s grip means the feed dogs aren’t fighting the layers, so your tension adjustments can focus on locking the stitch rather than forcing the fabric through.
General tension guidelines:
- Woven cottons/medium synthetics: Start with mid-range tension (e.g., 3-5 on a 0-9 scale)
- Thick stacks (denim, canvas): Increase top tension by 5-10 clicks
- Slippery synthetics (nylon, satin): Slightly higher top tension to prevent looping
- Delicate fabrics (silk, chiffon): Lower top tension to avoid puckering
Troubleshooting tension issues:
| Problem | Solution |
|---|---|
| Top thread pulls to back | Increase top tension slightly |
| Bobbin thread loops on top | Decrease top tension one notch |
| Layers still slide | Check bobbin case for damage/mismatch |
Pro tip: Always test tension on scrap fabric before sewing your project. The walking foot amplifies tension issues, so a setting that works on a standard foot may fail here.
Step 3: Select the Right Needle for Your Fabric
The walking foot doesn’t change what the needle does—it just makes the needle’s job easier by keeping the layers steady. Needle choice follows the same rules as always, but the walking foot amplifies the effects of a wrong needle:
| Fabric Type | Recommended Needle | Needle Size | Notes |
|---|---|---|---|
| Woven cottons | Universal | 80/12 | Standard for most projects |
| Denim/canvas | Denim or heavy-duty | 90/14 - 100/16 | Prevents deflection/bending |
| Slippery synthetics | Microtex or sharp | 70/10 - 80/12 | Pierces without skipping stitches |
| Knits/stretchy | Ballpoint | 75/11 - 90/14 | Pushes fibers aside |
| Delicate fabrics | Microtex or sharp | 60/8 - 70/10 | Minimizes visible holes |
| Vinyl/leather | Leather or denim | 90/14 - 110/18 | Prevents skipped stitches |
Needle maintenance:
- Replace the needle before it bends—once it deflects, it creates uneven pressure that the walking foot can’t compensate for
- Check for burrs or grooves on the needle shaft (can snag threads)
- Use high-quality needles (Schmetz, Organ, Superior) for consistent performance
Pro tip: If you hear a loud thump while sewing, the needle is likely bent or too large for the fabric. Stop immediately and replace it.
Step 4: Maintain the Walking Foot for Longevity
Dust, lint, and old oil can gum up the walking mechanism and slow the grippers. Proper maintenance ensures the foot works reliably for years.
Cleaning routine:
- After every project:
- Lift the presser foot and wipe the foot’s underside and feed dogs with a dry, lint-free cloth
- Use a soft brush to remove packed dust from moving parts
- Every few uses:
- Check the foot’s attachment point for burrs or grooves (can snag threads)
- Tighten screws evenly—uneven pressure can tilt the foot and cause uneven gripping
Lubrication:
- Oil the machine’s feed dog area and any visible metal parts on the walking foot according to your manual’s schedule
- Too little oil: Friction and wear
- Too much oil: Residue that attracts lint
Storage:
- Store the walking foot in a dry, dust-free container (e.g., a zippered case)
- Avoid stacking heavy items on top of it (can bend the grippers)
Pro tip: If the foot stops moving smoothly, disassemble it (if possible) and clean the grippers with rubbing alcohol to remove built-up residue.
Frequently Asked Questions
Ever wonder which fabrics need a walking foot—or whether your machine can even use one? Here’s the straight truth.
What Types of Fabrics Benefit Most from Using a Walking Foot?
A walking foot shines when layers fight each other:
- Multiple thicknesses: Denim over canvas, quilt top with batting
- Slippery synthetics: Nylon, satin, vinyl, polyester
- Piled fabrics: Faux fur, velvet, corduroy
- Heavy wovens: Denim, canvas, upholstery fabrics
Specific examples:
- Quilting: Keeps the top layer aligned with the batting and backing
- Upholstery: Feeds thick stacks of fabric + foam without shifting
- Garments: Prevents bias-cut pieces (like silk dresses) from stretching out of alignment
- Bags/belts: Handles multiple layers of heavy canvas or coated fabric
When it’s less helpful:
- Single-layer sewing (e.g., cotton or linen)
- Stretchy knits (ballpoint needles are better)
- Very delicate fabrics (may require a gentler grip pattern)
Can I Use a Walking Foot on Any Sewing Machine?
No. The walking foot must match your machine’s shank type:
- Low shank: Most domestic machines (Singer, Brother, Janome, Juki HZL)
- High shank: Industrial machines, some Berninas, Pfaff
- Slant shank: Older models (e.g., vintage Singers)
How to check compatibility:
- Look up your machine’s shank class in the manual
- Compare it to the walking foot’s packaging or manual
- Measure the old presser foot’s shank (distance from base to top of shaft)
Red flags:
- Foot sits too high/low on the presser bar
- Grippers miss the fabric or collide with feed dogs
- Needle misses the hole by more than a thread width
Exception: Some adjustable shank adapters (e.g., for Bernina) allow low-shank feet on high-shank machines. Check your manual first.
How Do I Install and Adjust a Walking Foot on My Sewing Machine?
Step-by-step installation:
- Remove the standard presser foot and needle plate cover
- Open the bobbin area to check for lint
- Hook the walking foot’s presser bar onto the machine’s presser bar pin
- Slide the foot down until it seats firmly (most low-shank feet click into place)
- Reattach the needle plate cover
Critical adjustments:
- Needle clearance:
- Turn the handwheel by hand
- Listen for scraping—if heard, loosen the foot’s set screw and nudge it back until the arm clears
- Presser foot pressure:
- Test on scrap fabric
- If layers slide, increase pressure gradually
- If you hear loud clunking, decrease pressure
Common mistakes:
- Skipping the needle clearance test → Grippers collide with needle/feed dogs
- Over-tightening pressure → Drags fabric, bends foot arm
- Not testing on scrap fabric → Wastes time and materials
Pro tip: Always test the fit and tension on a scrap of your project fabric before sewing.
Do I Need to Change My Sewing Technique When Using a Walking Foot?
Yes—but the changes are minimal. The walking foot handles the feeding, so you can focus on:
- Speed: Sew at your normal pace (no need to slow down for thick stacks)
- Stitch length: Use your standard settings (walking foot doesn’t affect this)
- Direction: Sew in any direction (walking foot works for straight stitches and gentle curves)
Adjustments to consider:
- Reduce pinning: The walking foot eliminates the need for temporary basting in most cases
- Use fewer pins: Only pin at the start/end of seams if needed
- Check tension more often: The walking foot amplifies tension issues
What not to do:
- Don’t force the fabric—let the foot do the work
- Don’t ignore tension adjustments—test on scrap first
- Don’t assume it works for all fabrics—test on your specific material
How Often Should I Replace My Walking Foot?
With proper care, a walking foot lasts 5-10 years or longer. Replace it if:
- Grippers are worn or missing (causes slipping)
- Base is bent or cracked (affects alignment)
- Shaft is loose or wobbles (signals internal damage)
- No longer fits your machine (due to wear or model changes)
Maintenance to extend its life:
- Clean after every project
- Store in a dry, dust-free case
- Oil moving parts as recommended in your manual
- Avoid dropping or bending the foot
Cost of replacement: $20–$60 depending on brand and shank class.
Can a Walking Foot Help with Puckered Seams?
Yes—but only if the puckering is caused by uneven feeding. A walking foot prevents puckering in:
- Thick stacks (denim, canvas)
- Slippery synthetics (nylon, satin)
- Layered fabrics (quilt tops with batting)
If puckering persists:
- Check tension settings (walking foot amplifies issues)
- Verify needle type/size (wrong needle causes drag)
- Ensure fabric is pre-washed (shrinkage can cause tension)
- Try basting first (for extremely thick stacks)
Pro tip: For severe puckering, baste the layers first, then sew with the walking foot for a final pass.
Common Mistakes to Avoid with a Walking Foot
Even experienced sewers make mistakes when using a walking foot. Avoid these five pitfalls to get the best results:
1. Skipping the Compatibility Check
Mistake: Assuming any walking foot will fit your machine. Result: Misalignment, skipped stitches, or damage to the foot/feed dogs.
How to avoid:
- Check your machine’s shank class in the manual
- Compare it to the walking foot’s packaging
- Measure the old presser foot’s shank if unsure
2. Ignoring Tension Adjustments
Mistake: Using the same tension as with a standard presser foot. Result: Looping, tension issues, or fabric distortion.
How to avoid:
- Start with mid-range tension for woven fabrics
- Increase top tension by 5-10 clicks for thick stacks
- Test on scrap fabric before sewing your project
3. Using the Wrong Needle
Mistake: Using a universal needle for heavy denim or a denim needle for delicate silk. Result: Bent needles, skipped stitches, or torn fabric.
How to avoid:
- Match the needle to the fabric type (see table in Step 3)
- Replace the needle before it bends
- Use high-quality needles for consistent performance
4. Over-Tightening Presser Foot Pressure
Mistake: Cranking the pressure dial to “force” the fabric through. Result: Drag, bunching, or a bent walking foot arm.
How to avoid:
- Increase pressure gradually until layers feed smoothly
- Listen for loud clunking—this means pressure is too high
- Use the minimum pressure needed for alignment
5. Neglecting Maintenance
Mistake: Using the walking foot without cleaning or oiling it. Result: Grippers gum up, feed becomes uneven, or the foot stops moving smoothly.
How to avoid:
- Wipe the foot’s underside and feed dogs after every project
- Use a soft brush to remove packed dust
- Oil moving parts according to your manual’s schedule
Advanced Tips for Walking Foot Mastery
Once you’ve mastered the basics, try these pro techniques to take your sewing to the next level.
1. Sewing Curves and Corners
The walking foot excels at straight seams, but it can handle gentle curves with the right technique:
- Mark your curve with tailor’s chalk or a fabric pen
- Sew slowly (use the handwheel if needed)
- Rotate the fabric, not the machine (keep the needle down)
- Clip curves on thick fabrics to reduce bulk
For tight curves:
- Use a walking foot with a narrow base
- Baste first to stabilize the layers
- Reduce pressure to avoid drag
2. Sewing Stretch Fabrics
The walking foot isn’t ideal for highly stretchy knits, but it can help with:
- Lightweight knits (jersey,
Keep reading
Want to go deeper? Read our guide on Sewing Machine Tension Discs: How They Work & What Goes.